50 Cozy Home Decor Ideas and Easy Hacks (Part One)
Welcome, friend. Are you ready to transform your home into a space that feels truly yours – cozy, stylish, calm, and yet still brimming with your personality?
I’m so excited to share my favorite home styling tips and simple hacks with you.
You’ll find everything from clever furniture fixes (ever heard of furniture risers?) to lighting magic, vertical styling secrets, and fun seasonal swaps.
When you’re done with this, part one, be sure to head on over to part two!
Consider this your ultimate guide to making any home – regardless of style or budget – shine like a sanctuary.
So grab a comfy seat (and maybe a cup of coffee or tea), and let’s dive into some home decor inspo for you.
By the end of this journey, you’ll have a toolbox of ideas to elevate your home’s aesthetic and functionality, one easy trick at a time.
Ready?
Let’s do this together!
Grab your favorite beverage, pen, and paper for notes; take your time to study the images, design tips, and products, and enjoy!
ps…remember to save this and come back anytime for a dose of inspo!
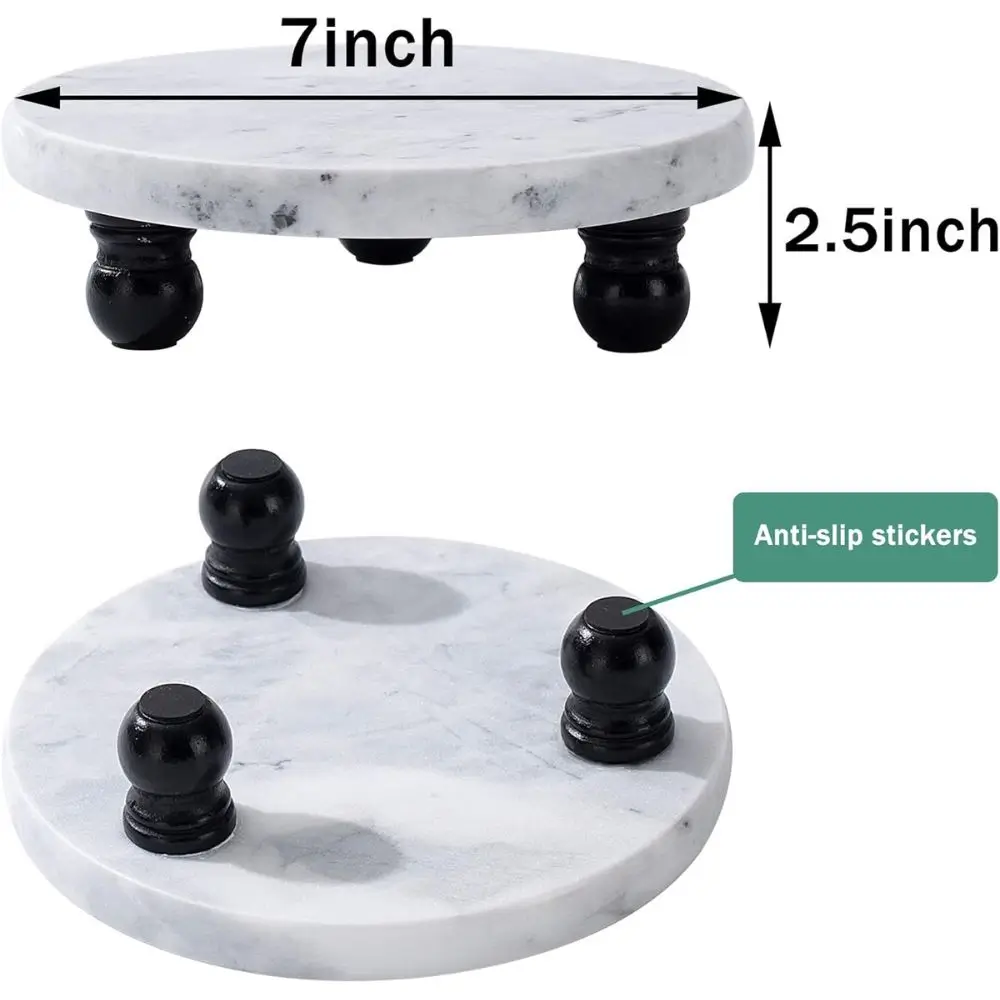
Furniture Risers: A Little Lift Goes a Long Way
When it comes to quick and affordable transformations, furniture risers are pure gold.
These handy little supports can raise your furniture by a few inches, literally elevating your space (and giving you bonus functionality).
It also creates extra storage space underneath for low baskets that tuck away everyday clutter.
Less clutter, more calm.
Use Furniture Risers
What are furniture risers?
Essentially, they’re sturdy blocks or cones you place under the legs of furniture like sofas, beds, or tables.
They might not be the most glamorous gadgets, but boy do they make a difference.
For instance, lifting your bed on risers instantly frees up valuable under-bed space.
It’s perfect for sliding in storage bins with off-season clothes, extra bedding, or those dozens of shoes (no judgment at all).
In a small bedroom, this trick is a lifesaver, giving you a whole new area to stash items out of sight while keeping the room tidy.
Beyond storage, furniture risers can also improve comfort and proportions. Have a dining table that’s a tad too low?
Or a desk that strains your posture? Pop some risers under the legs to bring it to a comfy height.

Now, you might wonder: Will raised furniture look awkward?
Not if you do it intentionally.
Choose risers that match your furniture legs (many come in wood tones, black, or clear acrylic).
Once in place, they’re hardly noticeable unless you’re really looking.
In fact, lifting a low-slung sofa or chair can make a room feel airier because you see more floor and the furniture doesn’t feel so grounded.
It’s a simple way to give heavier pieces a little breathing room without replacing them.
Get My Free eBook
“100 Easy Ways To Refresh Any Room All Year Round”
Use Decorative Risers For Accents
Here’s another fun tip: decorative risers for accent pieces.
These are smaller platforms or stands used to elevate decor items on surfaces (think of a cake stand, stack of books, or wooden block lifting a vase or candle).
By raising some items and not others, you create levels in your vignette that are more interesting to the eye.

For example, on a console table in a foyer, you can use a small marble riser and elevate a potted plant, while a shorter tray beside it can hold keys and sunglasses.
The varied heights add that designer touch, and it takes only a second to set up.
In short, don’t underestimate this simple trick.
Whether you’re slipping risers under bed legs to gain a storage nook or using a cute wooden stand to highlight your favorite decor piece, adding a little height can solve functional problems and add style.
Add your favorite home decor items to these risers…it’s amazing the feeling you have when you look at these items you’ve chosen.
Risers show that sometimes the easiest fixes make a big impact.
So go ahead – give your furniture a gentle lift, and enjoy the new perspective (and space) it brings.
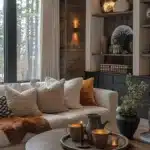
Lighting Tricks: Setting the Mood and Style

If there’s one element of decor that can completely transform the mood of a room, it’s lighting.
I could talk about lighting all day (seriously, I’m that nerd who gets excited about dimmer switches and lamp shades).
The right lighting makes your home feel warm and inviting, highlights your beautiful decor, and even influences how colors appear.
Let’s shed some light (pun intended) on a few insider tricks to make your home glow.
Layer Your Lighting

Designers often talk about lighting in layers: ambient, task, and accent lighting. In plain English, that means don’t rely on just one overhead light and call it a day.
Mix a variety of light sources at different heights.
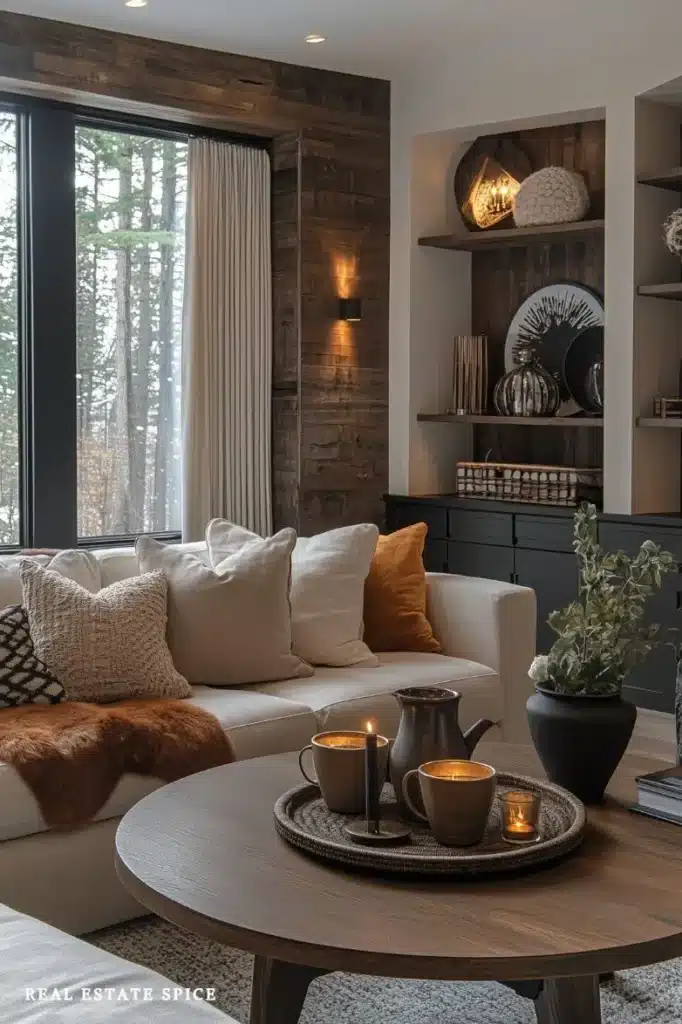
In my living room right now, I use a soft-glowing ceiling fixture for overall light, a floor lamp in the corner for a cozy reading spot, and table lamps on the side tables for gentle evening light.

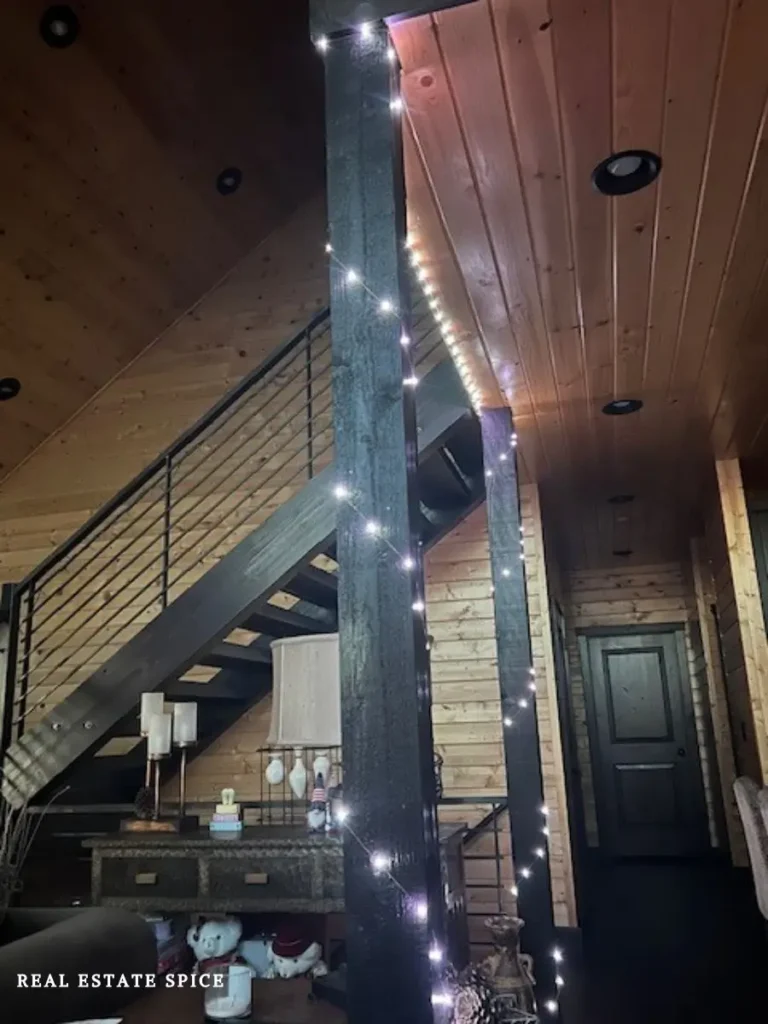
I’ve also added string lights on the mantle and a few flameless candles around the room to bring in that softer glow.

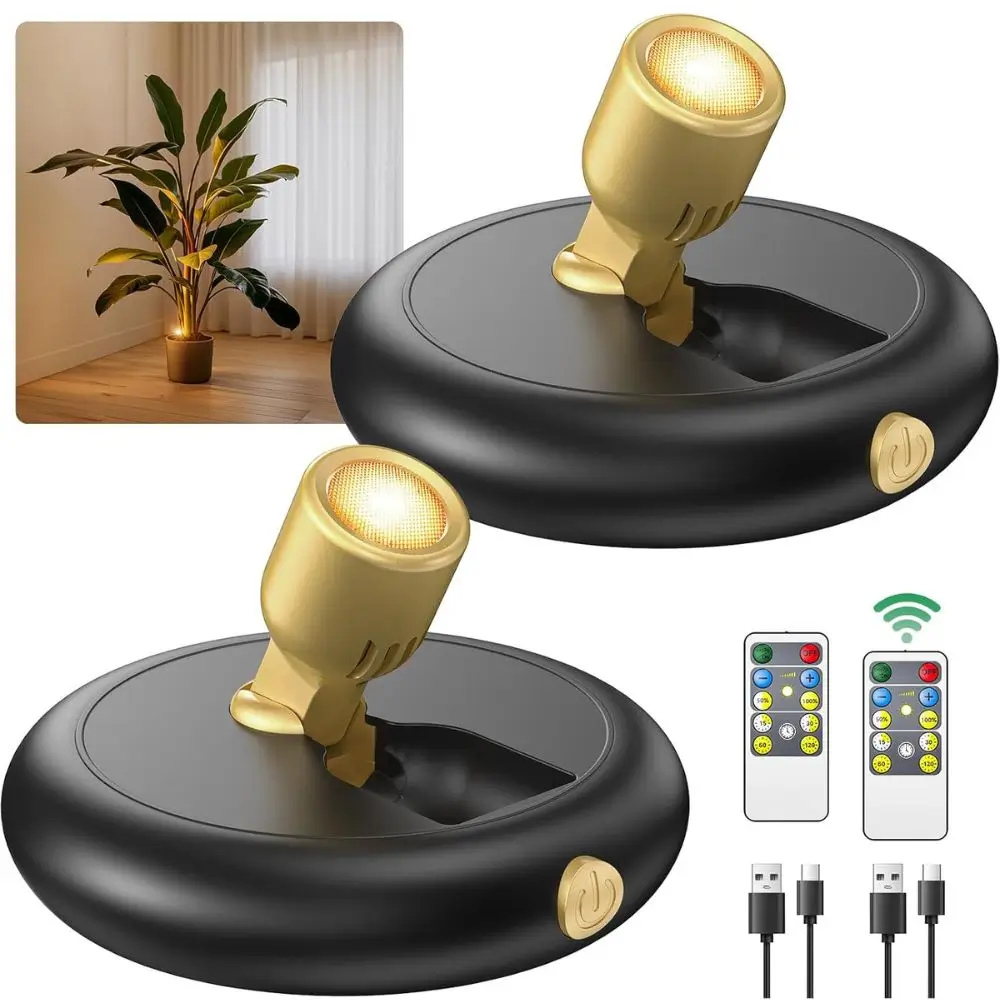
I also have flameless candles and tea lights strewn throughout.

I love, love these tea lights! They’re so easy to charge with the USB Power Port!
Each serves a purpose, and together they make the space feel dynamic and flexible.

In the daytime, I might not need any lamps (hello, sunshine), but come evening, I can turn off the harsh overhead and enjoy a warm lamp-lit ambiance that feels like a hug.

I also use these small, portable lamps to illuminate and add a soft aesthetic to various areas in my home.

Use Dimmers and Smart Bulbs
This is one of my favorite tricks for instant atmosphere.
Installing a dimmer switch on your main lights lets you dial the brightness up for say, homework or cleaning, and soften it down for a dinner party or movie night.
It’s incredible how one room can serve many vibes just by sliding a dimmer.
Similarly, consider swapping in some smart LED bulbs – the kind you can adjust with an app or voice assistant.

I have ones that shift from cool bright light (great for mornings when I need to wake up) to warm golden light (perfect for relaxing at night). Some even let you play with colors.
During the holidays, I’ll admit, I sometimes set my lamps to a gentle amber or soft green for festive fun. It’s like instant mood lighting at your fingertips.
Aim for warm, natural tones. Speaking of bulb colors – pay attention to the bulb’s warmth (measured in Kelvins, if you want the tech term).
For most living spaces, a warm-white bulb (around 2700K–3000K) is your best friend, casting that cozy yellow-ish glow.
It makes your home feel inviting and flattering, as opposed to the bluish hospital vibe of cool bulbs.
In areas like the kitchen or home office, you can go a bit cooler (for a bright, energetic feel) but I’d still stay around neutral white.

And always consider CRIs (Color Rendering Index) of bulbs if you can; high CRI bulbs make your decor colors look more true and vibrant. (Okay, that’s the end of my lighting geek-out, I promise!)
Accentuate With Accent Lights

This is where you can really have fun and showcase your style.
I love, love these tea lights! They’re so easy to charge with the USB Power Port!
Think tea lights casting a soft glow and fairy lights tucked into a glass vase or wrapped gently around furniture or beams.
You can also use LED strip lights under cabinets or behind your TV, or add picture lights above artwork to create layers of warmth.
I love these fairy lights. You can choose from so many different colors, is powered with a USB and comes with a remote.
We have several sets and even keep a few in our camper. We hang them in our camper and even inside our large tent!
They’re strewn in different areas in our house!

You can also use puck lights inside a bookshelf to spotlight some favorite framed photos and trinkets.
Those little pools of light create drama and draw the eye to what you want to feature.
Candles count as accent lighting too – nothing beats the flicker of candles (or battery-operated faux candles for safety) to add instant charm on a coffee or dining table.
I love, love these tea lights! They’re so easy to charge with the USB Power Port!
Maximize Natural Light By Day

All the electric lights aside, never forget the original source: Ms. Sun.
Embrace natural light to make spaces feel bigger and happier.
Simple moves like keeping window treatments open during the day, using sheer curtains that let light through, and placing mirrors (more on mirrors soon!) across from windows can double the daylight in your room.

My friend had a small, dark entryway; I suggested she hang a big mirror on the wall opposite the doorway, and it reflected the sunlight from the adjacent room, brightening the foyer significantly.
Plus, she got a nice spot to check her outfit on the way out – bonus functionality!
And here’s a little trick: consider the height of your lampshades and the transparency of materials.
A lamp with a translucent shade will diffuse light widely, while a dark, opaque shade focuses it more up and down.
Both have their place.
Consider a drum shade on your living room lamp for a soft, room-filling glow.
But on your bedside tables, a metal-shaded lamp that directs light downward for a cozy, book-reading pool of light without being in your eyes.
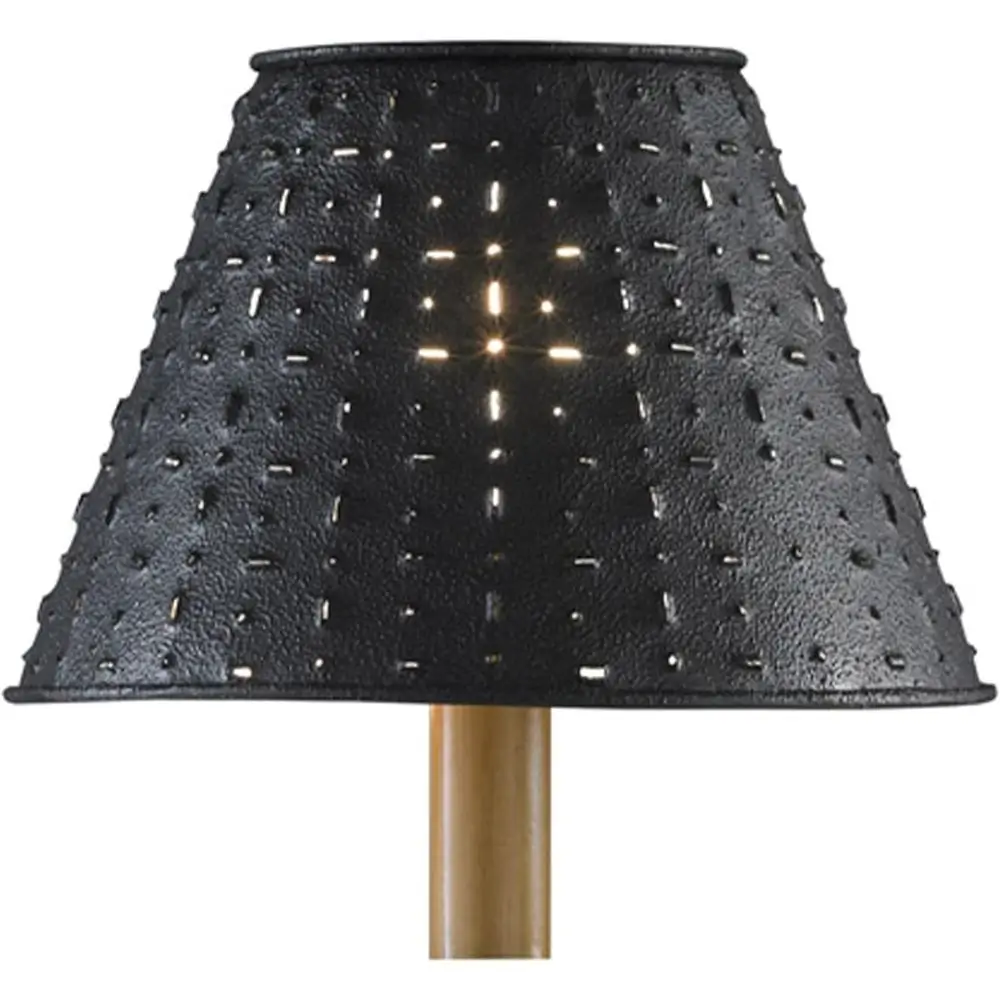
It’s all about what you need in that spot.
The bottom line is, don’t settle for bad lighting.
Play around with combinations of lights until your rooms give off the vibe you love.
When guests tell me, “Your home feels so cozy, I don’t want to leave,” I secretly credit the dimmed lamps, candles, and tea lights as much as the fluffy pillows and cozy throw blankets.
So experiment with these lighting tricks – I promise they’ll make you see your home in a whole new light (I had to get one more pun in)!
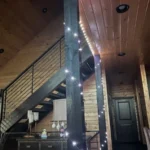
Vertical Styling: Using Your Height in Decor

Let’s move up – literally! Vertical styling is all about making use of the often-forgotten upward space in your home.
We tend to focus on floor plans and furniture layouts, but what about those walls and high-up areas?
By drawing the eye upward, you not only add visual interest, but also make a room feel larger and more grand. (As a 5’2” gal, I’ve learned to appreciate vertical real estate – it’s like adding a few extra inches to your home’s “height”.)
So how do we style vertically?
Plenty of fun ways.
Hang ’em High!

Hanging curtains close to the ceiling can instantly make a room feel taller and more open.
One of the simplest vertical tricks is to hang your curtains floor-to-ceiling.
Instead of mounting the rod right on top of the window frame, go a good bit higher – maybe halfway between the top of the window and the ceiling, or even all the way up at ceiling level if your trim allows.
And make sure those curtains are long enough to just kiss the floor (or puddle slightly if you like that look). This little change makes your ceilings look loftier and the whole room more elegant.
I did this in a standard eight-foot ceiling bedroom, and friends seriously asked if we had raised the ceiling. Nope, just tricked the eye!
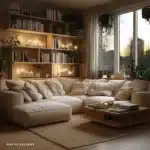
Tall Bookcases and Shelving
Another vertical styling move: use tall bookcases, étagères (open decorative display shelves), or shelving units that go up, up, up.
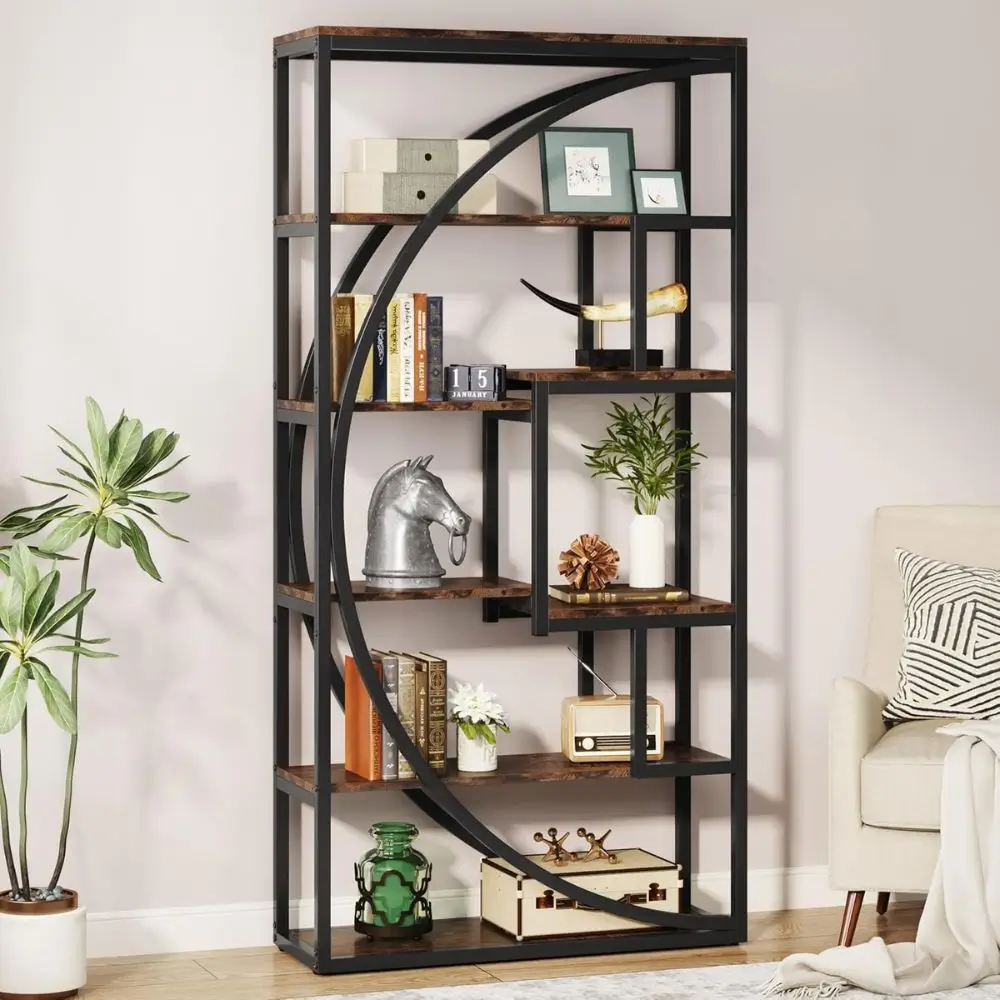
If you have the budget and a bit of carpentry mojo, built-in shelves that run from floor to near-ceiling are the chef’s kiss.
They draw the eyes upward and provide tons of display or storage space.
But even a ready-made tall bookshelf will do.
Style your high shelves with lightweight decor (baskets, vases, trailing plants) so it doesn’t feel top-heavy.

I also love adding a small decorative ladder or blanket ladder leaning against a wall – it gives that vertical line and doubles as storage for throws or magazines.

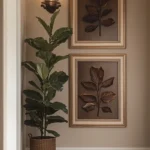
Vertical Wall Decor

Think beyond horizontal rows of art.
For instance, a trio of frames stacked one above the other will make a narrow wall feel purposeful and taller.
Arranging art or photos in a vertical column can accentuate height.
Stack framed artwork in a vertical line in a corner – it turns dead space into an art moment, pulling the eye up from the potted plant on the floor all the way to the top artwork.
Add a wall sconce for a touch of light and drama.

Also, consider pieces that are inherently vertical: a tall leaner mirror propped against the wall, a vertical canvas painting, or a narrow tapestry can all celebrate your wall height.
Vertical Patterns and Treatments

This is a nifty design secret: patterns that run vertically create an illusion of height.
For example, if you’re adding wainscoting or paneling, consider vertical slats or board-and-batten that draw the eye up.
Even something as simple as painting vertical stripes (or using striped wallpaper) will elongate the room.
I helped a friend with a powder room makeover – we did bold vertical stripes in white and soft blue, and that little room suddenly felt like it grew a few feet taller.
Don’t overdo super busy patterns in a small space though; keep stripes moderate in width and contrast so it’s not dizzying. But the concept of vertical lines is your friend.
Plants and Floor Lamps

And let’s not forget plants and lamps – decor items themselves can add vertical emphasis.
A tall floor lamp, a tall plant, live or faux tree in the corner, or even a group of candlesticks of varying heights on a mantle all guide the gaze upward.

One of my go-to tricks for staging a room is placing a large statement plant, tree or tall vase of branches in a corner that otherwise would be empty.

That bit of vertical decor balances out lower furniture and adds life (literally, if it’s a plant!).
Lastly, use caution not to crowd everything at eye-level.
Leave some breathing room on surfaces by lifting some pieces higher.
For example, instead of five knick-knacks lined across a shelf, put two or three on stacked books or small pedestals (hello decorative risers again!).

The variation in height will be more pleasing.
Vertical styling is basically about leading the eye up so your room gains that extra dimension.
High-hung curtains, lofty shelves, vertical decor arrangements – each is a little step stool for the eyes.
You’ll be amazed how much taller and spacious your home can feel, no renovation required. So embrace your vertical space; there’s nowhere to go but up!
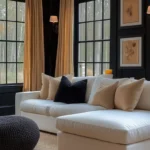
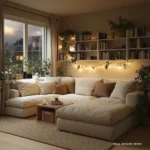
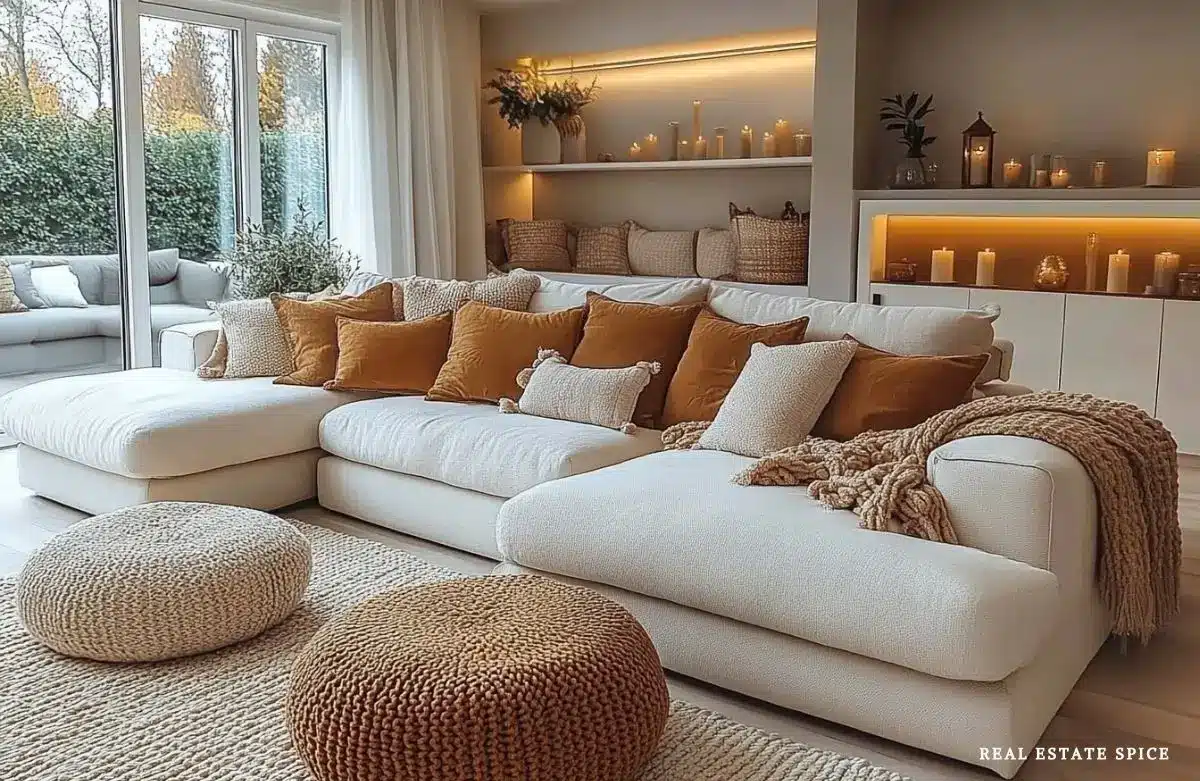
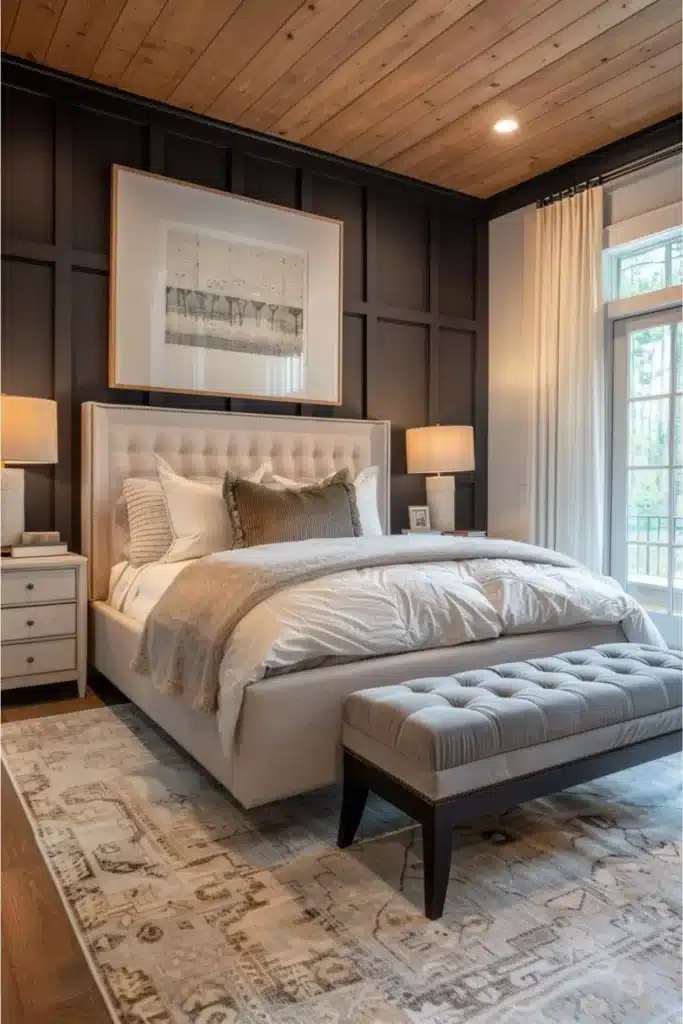
Textiles and Fabrics: Cozy Layers and Touchable Textures

Here’s a secret weapon to instantly make your home feel inviting and styled: textiles.
I’m talking pillows, throws, rugs, curtains, bedding, upholstery – all the soft, touchable things that add color, pattern, and coziness.
If furniture forms the bones of a room, textiles are the clothes – and we all know an outfit can totally change someone’s look, right?
The same goes for rooms. Let’s play textile stylist for a bit.
Layer Up the Pillows and Throws

I often joke that I have a pillow problem (as in, I can’t stop buying them). But truth is, swapping out throw pillows is one of the easiest ways to refresh a room’s look.
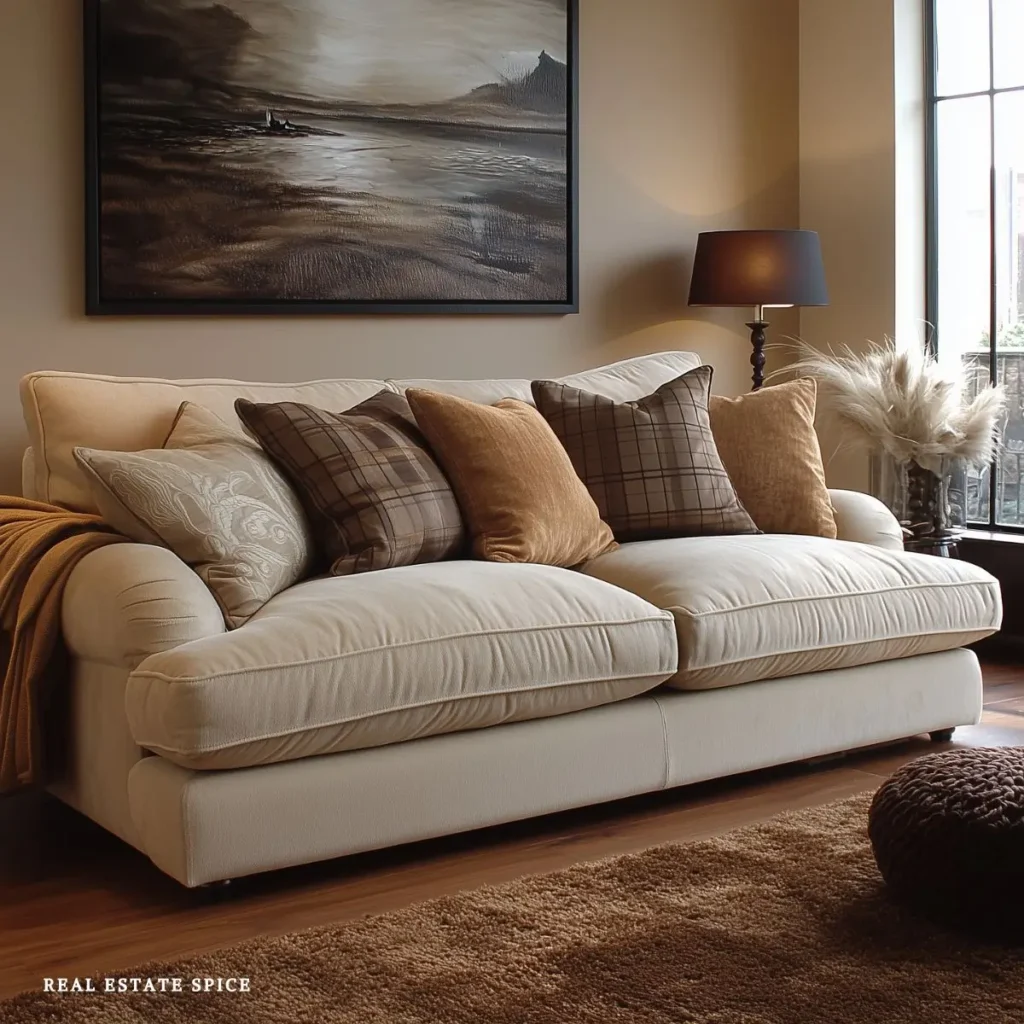
On a plain sofa, try adding a mix of throw pillows in different sizes and textures. For example, you might have two large 20-inch pillows in a subtle pattern, a couple of slightly smaller solid velvet or chunky knit ones, and one lumbar pillow with a bold print or saying on it.

This mix instantly makes the couch look styled by a pro. And don’t be afraid to mix patterns – a general rule is vary the scale (one large print, one small print, one solid or geometric) and stick to a cohesive color scheme.

My living room for fall currently has pillows in warm rust, cream, and sage green: one has a fall leaf pattern, one is a fuzzy ivory faux fur, and one is a simple green linen. They invite you to plop down and relax.
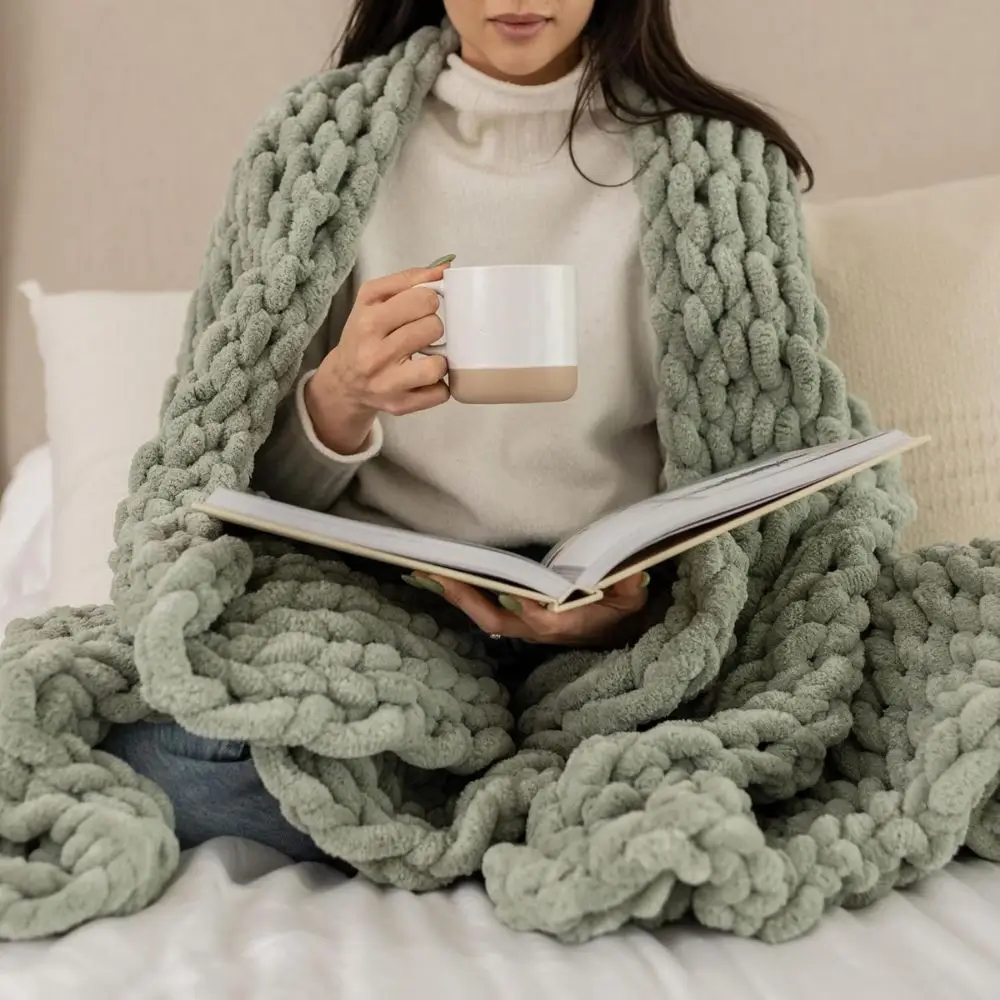
Drape a throw blanket casually over an armrest or the back of a chair, and voila – you’ve added texture and a feeling of warmth.

In the winter, I opt for thick, nubby knit throws or faux fur blankets that scream cozy cabin vibes.
In summer, I might switch to a light linen or cotton throw in a fresh color, just to lighten the mood.
These little fabric changes reflect the season and keep the room feeling current without a big investment.

Plus, they’re functional – who doesn’t love snuggling under a soft throw during a movie night?
Area Rugs Anchor the Space
Never underestimate the power of a good rug.
A rug adds color/pattern underfoot and literally pulls a room together by anchoring furniture.
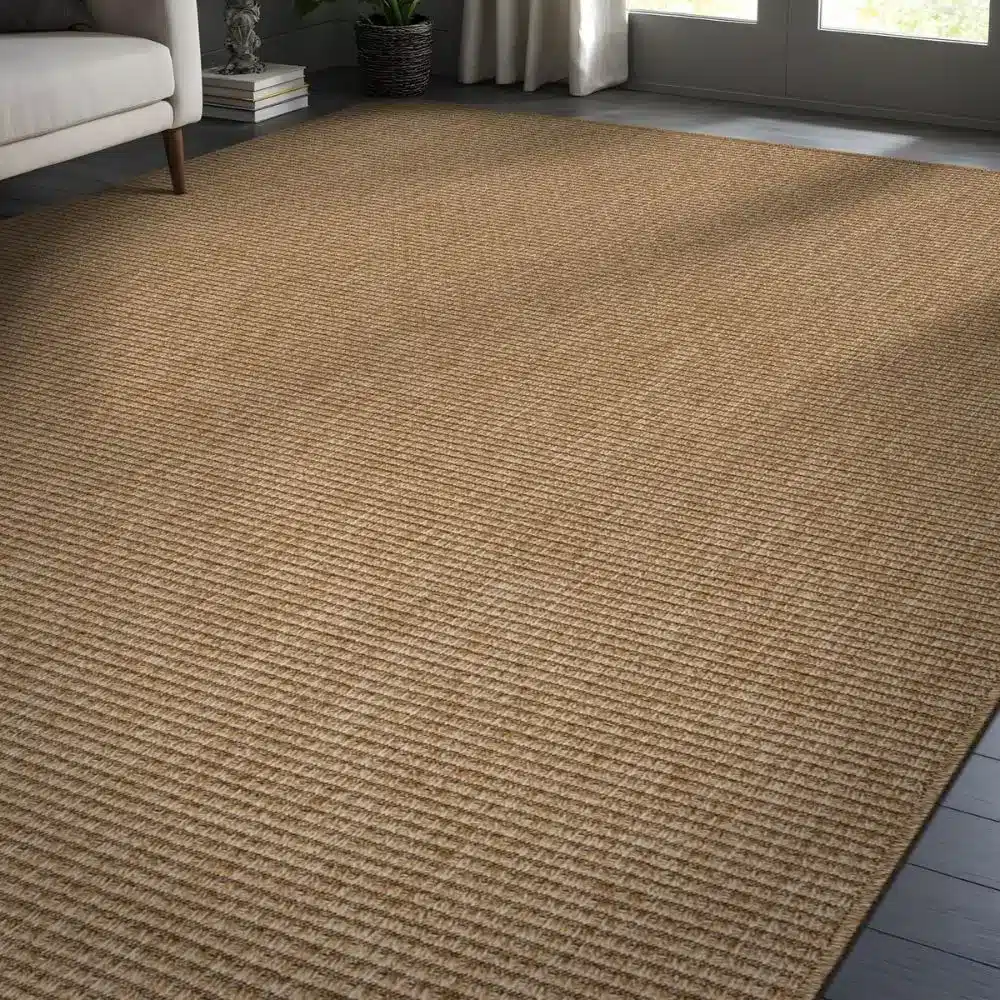
One common styling mistake is using a rug that’s too small – it makes everything feel cramped. Instead, choose a rug that’s large enough so at least the front legs of your furniture sit on it (or ideally all legs).
This way, your seating area feels unified. For example, in a living room, a generous rug under the coffee table that reaches under the sofa and chairs defines that conversation zone.

And don’t shy from layering rugs if it suits your style: a jute or sisal natural rug can be a neutral base, with a smaller vintage Persian-style rug layered at an angle on top for flair. It adds depth and a designer look.

Textures matter here, big time. Mixing textures in textiles adds dimension. Pair smooth with chunky, silky with coarse.
In my bedroom, I have crisp cotton sheets (cool and smooth), a luxe knit throw at the foot of the bed (cozy and chunky), velvet accent pillows (soft and rich), and linen curtains (light and airy).
This combo of textures makes the room visually interesting and oh-so-touchable. When everything is one note – say all slick or all fuzzy – it can fall flat. Contrast is key.
And talk about comfort: textiles literally soften a space. If you have a lot of hard surfaces (wood floors, leather sofa, glass tables), adding fabric elements like an upholstered ottoman, a fabric wall hanging or tapestry, or even just more fabric accents can balance it out.
I once helped a friend who moved into a modern loft with concrete floors and metal fixtures – it felt cold until we layered in a huge plush rug, floor-length drapes, and oversized floor pillows in the lounge area.
Instantly, the echoey chill turned into a welcoming nest.
Window treatments are another textile opportunity. Curtains or roman shades can introduce pattern or color at eye level and frame your windows beautifully.

Even if you prefer blinds for privacy, adding side panels of drapery (they can be purely decorative, not even functional) will soften the window edges and make the room feel finished.
Choose fabric that complements your pillows or rug for a cohesive look – for example, if you have a bold floral pillow, you might pick up one of the flower’s colors in solid curtains, or vice versa.
One more tip: seasonal textile swaps (which we’ll get more into later) are the budget decorator’s secret. Keep a stash of pillow covers and swap them out spring/summer vs fall/winter.
Lighter, brighter colors and maybe breezy stripes or florals for warm months; deeper colors and heavier, plush textures for cold months.
I even swap out my kitchen hand towels and entryway rug to coordinate with the seasons – it’s oddly satisfying and gives a fresh feel year-round.
So go ahead, play with fabrics! Pile on those cushions, sink your toes into that soft rug, and let your home embrace you with texture and warmth.
The best part is how easy it is to change textiles when you crave a new look. It’s like giving your room a mini makeover, no paintbrush or power tools required.
Tray Styling: Little Vignettes with Big Impact

Let’s talk about one of my absolute favorite styling tricks: tray styling. It’s amazing how a simple tray – yes, the kind you serve drinks on – can be a game-changer in home decor.
Trays help corral items into pretty groupings (vignettes), making random decor look intentional. And they’re portable, which means you can easily move the whole arrangement when you need the surface for something else.
If you’ve ever admired those perfectly styled coffee tables in magazines, chances are a tray was involved. Here’s how you can do it too.
Choose the Right Tray
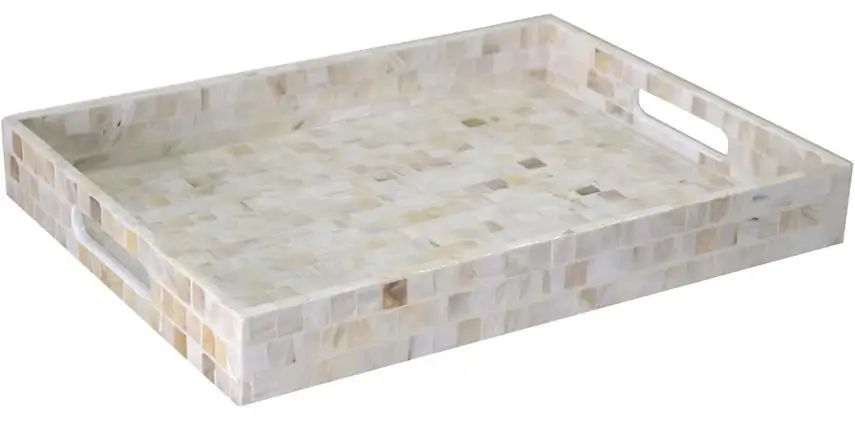
First, choose the right tray for the spot. It could be a sleek mirrored tray on a dresser, a rustic wooden tray on an ottoman, a woven rattan tray or mother of pearl tray on a coffee table – match the tray style to your decor vibe.
Size matters too: big enough to hold a few objects but not so big it swallows your table. I usually pick a tray that leaves some border of the table visible around it. For a rectangular coffee table, consider using a large round tray (the contrast in shape is visually pleasing).

On a small side table, a petite rectangular tray does the trick.
Gather Your Decor Items
Now, gather your decor items. This is where you can get creative and personal.
A tried-and-true formula is: something tall, something short, and something sculptural or unique.
For example, on my coffee table tray I currently have flameless candles, stones, and a figurine on it. I swap the items out and celebrate the different seasons and holidays with seasonal items, tea lights, and candles.

I love, love these tea lights! They’re so easy to charge with the USB Power Port!
Play With Odd numbers
Grouping objects in odd numbers (3 or 5 typically) tends to be more visually appealing. Our eyes just like it.
If you have a larger tray, you might do five items, but be careful it doesn’t become cluttered. Three is often enough for most coffee tables.
On a kitchen island, I’ve styled a bigger tray with five things: a vase of flowers, a ceramic canister of wooden spoons, a small cutting board, a candle, and a bowl of lemons.
It looks like a lovely farmhouse vignette, but everything’s within one tray so when I need the island to, say, roll out cookie dough, I just lift the whole tray away.
Balance Practicality and Prettiness
Trays are perfect for keeping everyday items within reach yet contained. On an ottoman, you can use a tray to hold the TV remote, a little dish for coasters, and a plant.
It turns the ottoman into a pseudo-coffee-table, and you can easily set it aside when someone needs to kick their feet up.
On a bathroom counter, a small tray can hold soap dispensers, perfumes, and a candle, instantly making the counter feel organized and spa-like. It’s form and function working together.
Seasonal Tray Makeovers

Don’t forget about seasonal tray makeovers too. This is a fun one!
For instance, in fall, I’ll add a mini pumpkin and some pinecones or autumn potpourri to my fall trays.
In winter, maybe some holiday ornaments or a sprig of evergreen. Springtime might bring fresh tulips in a bud vase on the tray.

These little decorative embraces keep your decor feeling current and festive with minimal effort…even Valentine Decor!
You’re not re-decorating the whole house, you’re just refreshing what’s on the tray.

I created this cheerful summer tray to capture the carefree spirit of the summer season—bright, colorful, and full of sunshine!
The playful flip-flops and vibrant “Hello Sweet Summer” sign instantly uplift any space with fun summer vibes. It’s a sweet reminder of beach days, sunny afternoons, and joyful moments. Place it on your kitchen island, coffee table, dining table, console table, bedroom dresser or entryway table for an instant mood boost.
Every glance will bring a smile and a burst of happiness into your home!

Mind The Proportions
Finally, mind the proportions of your tray and objects. If your tray is large, you can go bigger with objects (a chunky vase, a wide stack of books).
If the tray is tiny, choose daintier items (a small candle, a single bud vase, and a cute mini figurine, for example).
Also, vary texture and color: mix something shiny with something matte, something soft with something hard. This variety makes the vignette interesting.
Once you start using trays, you might get hooked like I did. They’re addictive in the best way.
Your surfaces will never feel cluttered or boring again – you’ll have magazine-worthy vignettes that also make your stuff easier to manage.
So grab a tray (or swipe one from the kitchen you’re not using) and give it a try on your coffee table or dresser.
You’ll see what a difference a little organizing and styling can make!
Paint Ideas: Color Your World (Without a Full Remodel)
Never underestimate the power of paint. It’s arguably the most cost-effective way to dramatically change a space’s look.
A couple of gallons and a weekend of work can make a drab room fab again.
But beyond just slapping a new color on the walls, let’s talk some creative paint ideas and strategies to add style and personality to your home.
Accent Walls
Pick one wall and make it pop! Accent walls are great for adding a bold color or pattern without overwhelming the whole room.
For example, paint the wall behind your bed a deep teal, charcoal black a warm terracotta, while the other walls stay a neutral cream. Suddenly the room has a focal point and feels designed.

In living rooms, I often choose the fireplace wall or the wall behind the sofa for an accent color.
You can also use an accent wall to visually separate a space – like painting the dining area wall in an open floor plan a different color to define that zone.
I helped a friend in her home where the kitchen and living were one; a soft sage green on the kitchen wall set it apart from the white living area, and it made the whole place feel more structured and intentional.
Two-tone walls and color blocking
Why settle for one color when you can have two?
One fun trick is two-tone walls – typically the lower half one color and the upper half another. It can mimic the look of wainscoting or add architecture where there is none.
A classic approach is darker color on the bottom, lighter on top, which can make the room look taller (the lighter upper half blends with the ceiling more).
For instance, paint the bottom 3 or 4 feet of the wall (plus trim) a rich navy or forest green, and above that a soft white or gray.
Add interest to a nursery with a dusty blue on the bottom and white above, with a crisp stripe at the transition – it will look so cheerful and have that old-fashioned charm of a chair rail without actually installing one.
You can also go artsy with color blocking: paint geometric shapes or a diagonal split on a wall in two or three complementary colors.

This wall idea works great in for a modern living room or a kid’s playroom for a burst of energy.
Paint or wallpaper the ceiling (the “5th wall”)

Ceilings are too often ignored, and the left builder-basic is white. But painting the ceiling can add an unexpected design moment.
If you have high ceilings or interesting molding, consider a pale sky blue or a metallic pearl sheen up there.
In a small powder room, try a fun color or even a wallpaper on the ceiling for a jewel-box effect.
One of my favorite tricks for a cozy den or bedroom is to paint or wallpaper the ceiling a very soft version of the wall color (like a light taupe ceiling with medium taupe walls) – it makes the room feel enveloping and warm, almost like a hug.
If you’re nervous, start with a light color that’s not too far from white, so it’s subtle. But trust me, when guests look up and notice your ceiling, “Wow, even the ceiling is beautiful!” – you get major style points.
Doors and trim as accents
Don’t forget doors, baseboards, and window trim. Painting interior doors a color (like black, deep green, or even a sunny yellow) can turn a boring hallway into something special.
And it’s far easier to paint a door than a whole wall, so it’s a nice beginner project. Similarly, painting trim in a contrasting hue can highlight architectural details.
For example, a dining room with white walls and charcoal gray crown molding and baseboards – super sophisticated!
Or flip it: walls with color and crisp white trim for a traditional vibe. Lately, a trend I adore is painting trim and walls the same color – especially in rich, deep hues.
Imagine a space where the walls, crown, baseboards, even built-in shelves are all painted in deep, rich colors.
It creates a seamless, luxurious look (designers call it “color drenching”). It can actually make a small room feel larger because your eye isn’t breaking at the white trim lines; everything flows.

Furniture and cabinets refresh

Paint isn’t just for walls – consider your furniture fair game too. Old dresser from the thrift store?
Paint it a glossy navy blue or a cheerful yellow and swap the knobs for an instant showpiece.
Kitchen looking dated but a full renovation is out of budget? Paint those cabinets. Yes, it’s a bit of work, but for the cost of primer, paint, and a weekend of labor you can have “new” cabinets.
In a prior home, I painted a tired oak bathroom vanity a soft greige and added black hardware; it went from blah to Pinterest-worthy by Monday.
You can even paint tile backsplashes or floors with the right specialty paints and stencils to mimic cement tile patterns (as a temporary fix until you can replace them).
The sky’s the limit.
One pro tip: sample, sample, sample! Paint colors can look wildly different in your home than on a tiny chip or in someone else’s photo.
Get those little sample pots or peel-and-stick samples, and try them on your wall in a few spots. Look at it in daylight and lamplight. Live with it a couple days if you can.

This prevents the “oh no, that’s not what I wanted!” moment after you’ve painted an entire room Pepto-Bismol pink (unless that’s what you wanted, then kudos!).
Lastly, remember that paint is forgiving and changeable. If you take a risk – like a bold emerald green dining room – and you tire of it in two years, you can always paint over it with a new color.
No harm done. So I encourage you to be playful and express yourself with paint. It’s only a few hours and a few bucks between you and a whole new vibe in your home.
Color has power, so use it to your advantage and watch those rooms come alive.
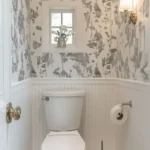
Wall Treatments: Beyond Plain Painted Walls

While we’re on the subject of walls, let’s explore some wall treatments and wall ideas that go beyond a simple coat of paint.
Don’t get me wrong – I love paint – but sometimes walls crave a little extra texture or pattern.
And giving your walls some attention can completely elevate your home’s style, making even a builder-basic room look custom and high-end.
The good news? There are options for every budget and skill level, from peel-and-stick solutions to full-on DIY paneling. Here are a few ideas to get your wheels turning.
Wallpaper Wonders

Wallpaper has made a major comeback in the design world, and it’s easy to see why.
There are endless patterns, colors, and textures available now – far from the fusty florals of your grandma’s era (though actually, florals can be super chic in the right print!).
Consider an accent wall in wallpaper, or even a whole room if you’re feeling adventurous.
Powder rooms are my favorite place to go wild with wallpaper – because they’re small, you can choose a bolder print that might feel like too much in a big room, and it becomes this delightful jewel box that surprises guests.

If commitment scares you, try peel-and-stick wallpaper. It’s essentially a big sticker that you can remove later with no damage.
You can do a renter-friendly accent wall behind a bed with peel-and-stick, and it will look absolutely fabulous, then peel off clean when it’s time to move.


Wooden wall panels and trim

Adding wood details gives instant character and adds a feeling of calm in the space.

Board-and-batten is another popular DIY: you attach strips of wood or MDF in a grid or pattern and paint it all the same color, creating a dimensional look.

These kinds of treatments add texture and architectural interest where there was none.
Transforming a plain wall with faux brick wall paneling can also add depth and drama to a room.
Textured finishes

Not everything has to be something you physically attach – you can also paint on texture.
Specialty paint techniques like Venetian plaster, limewash, or even a simple color wash can give walls a slightly weathered, stone-like or cloudy effect that’s oh-so-European and elegant.
For example, limewashing your walls (a method using a mineral paint that adds depth and slight variegation) can make a new house feel like it has centuries of story.
It’s a bit of an art project, but the end result is subtle and lovely.
Decals and murals

If you want something fun and less permanent than wallpaper, consider vinyl wall decals.

These can range from simple polka dots you scatter on a nursery wall to huge botanical decals that make a statement in a living room.
They peel off without damage, so they’re rental-friendly and commitment-phobic-approved.
Wall stencils are another option: you paint through a stencil to create a repeating pattern.
It’s more labor than wallpaper, but cheaper, and you can choose any paint color.
Also, don’t forget fabric as wall decor. A large tapestry, quilt, or piece of fabric art can cover a big expanse of wall with color and pattern and is easily swapped out.

And of course, gallery walls and art arrangements are a treatment in themselves. Filling a wall with a curated mix of art, mirrors, or framed photos gives it life and character.

You can do a neat grid of identical frames for a modern look or an eclectic mix of sizes and styles for a boho vibe.
It’s a way of treating the wall as a canvas to tell a story – your story – through the pieces you display.
Pro tip: trace your frames on paper and tape the paper cutouts on the wall to plan the layout without making a million nail holes. Or, arrange them on the floor first until you find the perfect configuration.
Whatever wall treatment you choose, it’s about breaking out of flatland.
Texture, pattern, and dimension on the walls can make a room feel richer and more interesting. Even one accent wall can have a huge effect (like the different paneled walls in the photos in this section).

So if you’ve got blank walls staring at you, consider dressing them up a bit.
It’s like giving your room an accent or a piece of jewelry that completes the outfit. And the best part?
Many wall treatments are DIY-friendly and can be done on a shoestring budget. Go ahead and give those walls some love!
Plant Styling: Bringing the Outdoors In

Let’s bring a little life (literally!) into your decor. Indoor plants are one of the most rewarding styling elements – they add color, texture, and a fresh vibe that’s hard to replicate with anything else.
Even if you don’t have a green thumb, there are plenty of easy-care plants (and even convincing faux plants) that can do the trick. I truly believe every room benefits from a bit of greenery.
Plants make a house feel like a home – they purify the air, create a calming atmosphere, and they’re like ever-evolving decor because they grow and change over time. So how do we style with plants in a beautiful way? Here are my favorite tips.
Mix up sizes and heights
One lonely little fern on a huge coffee table might look a bit lost. Instead, think in terms of groupings and variety.
Combine small tabletop plants (like succulents, herbs, or little snake plants) with medium floor plants (like a peace lily or rubber plant in a nice pot by a chair), and maybe one or two statement big guys (like a tall fiddle leaf fig, monstera, or dracaena in a floor planter).
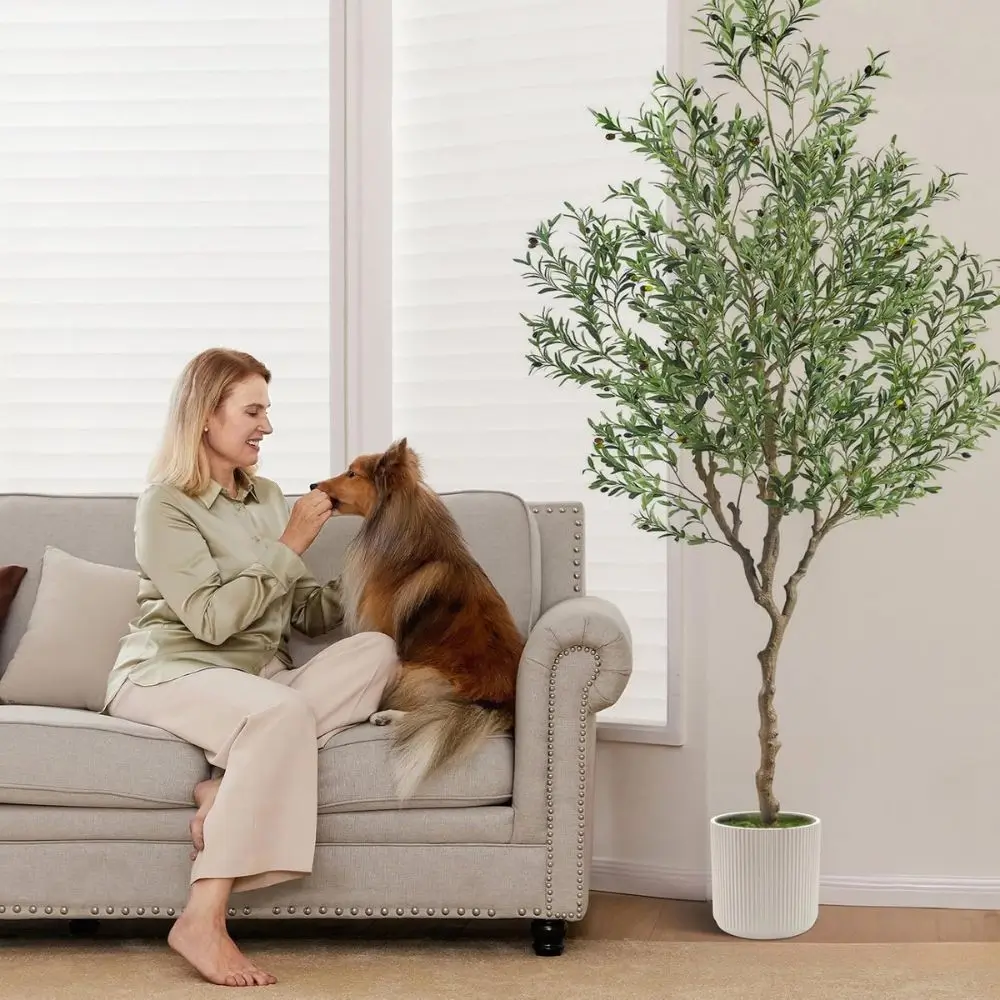
I added this faux olive tree to my space and placed dimmers on the floor shining up. It’s an instant transformation!
I feel like I’m in my own cozy, resort suite!

By having plants at different levels – hanging, on stands, on shelves, on the floor – you create a lush layered look as if your room has its own mini ecosystem.
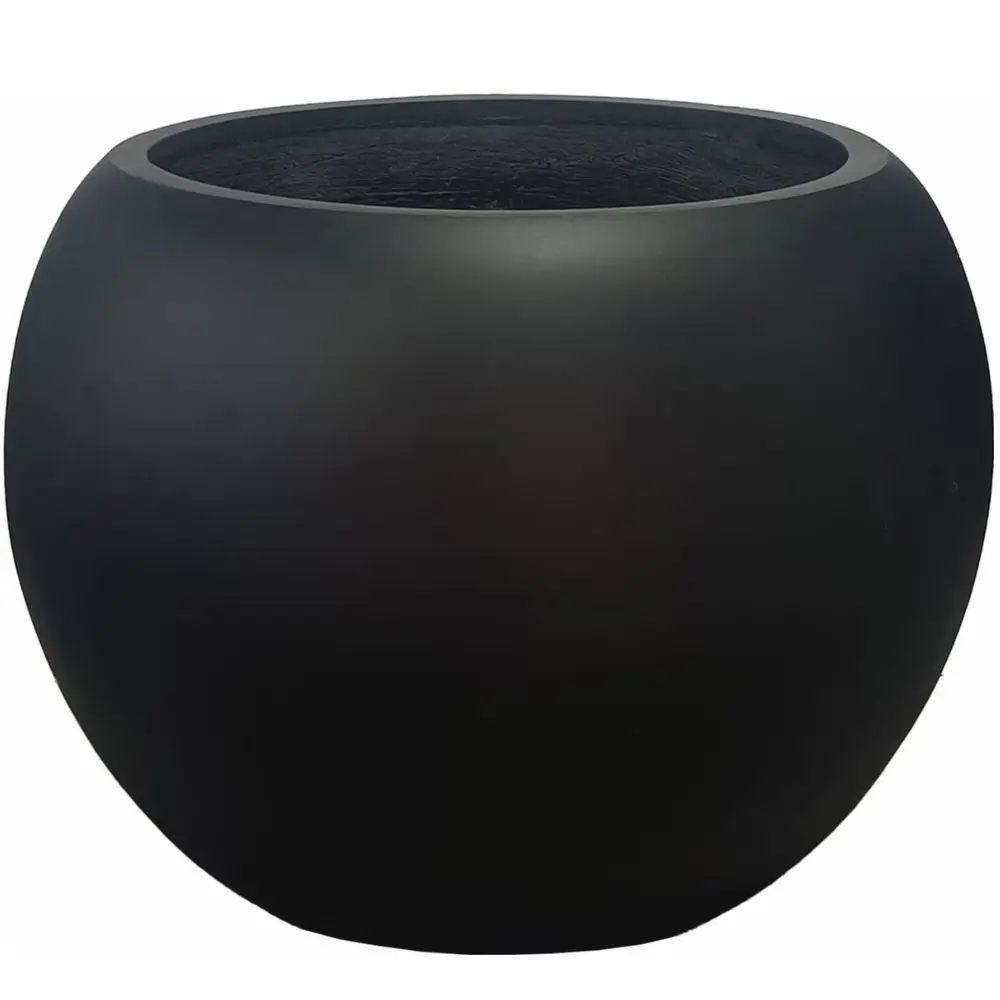
Choose stylish planters
The pot or planter you use is an opportunity to complement your decor. Baskets, ceramic pots, terracotta, metallic stands – there are endless choices.
A cute woven basket can add a cozy, boho touch around a potted palm. A sleek black or white ceramic pot might suit a modern space.
And plant stands are great for giving some height (back to vertical styling!) and keeping plants off delicate surfaces.
Just be sure whatever you use either has drainage or you tuck a plastic liner inside and be careful watering.
If you’re like me and sometimes overwater, consider pots with drainage holes and a tray.
Find the right spot (for the plant and the aesthetic)

Plants have needs – light, especially. A styling tip is only successful if your plant can thrive there; otherwise, you’ll end up with a sad, droopy accent (no thanks).
So match your plant to the lighting of the spot.
Got a dim corner that needs love?
A low-light tolerant plant like a snake plant or ZZ plant could work there.
That sunny sill begging for adornment?
Try succulents, cacti, or herbs that love direct sun.
Once you’ve matched plant to place, consider the backdrop. Sometimes clustering plants together creates a charming green focal point.
For instance, placing three plants of varying heights next to each other on a plant stand or window ledge can have more impact than scattering them solo around the room.
Use plants as functional decor

By that I mean they can fill awkward spaces or soften hard lines.
Got an empty corner that’s too small for furniture?
Pop a tall leafy plant there.
Have a shelf of electronics or cords?
Let a trailing ivy live there and camouflage some of that tech.
Seasonal and faux options
Plants can be “seasonal” too.
In spring, I’ll buy a bunch of tulips or daffodils and have fresh flowers (okay, technically not houseplants, but nature nonetheless!) on the table for as long as they’re in bloom.

In autumn, a vase of dried wheat or pampas grass gives a rustic vibe.
Around holidays, a poinsettia or mini Christmas tree adds festivity.
And if real plants scare you because of maintenance, today’s faux plants are surprisingly realistic.
I added this faux olive tree to my space and placed dimmers on the floor shining up. It’s an instant transformation!
I feel like I’m in my own cozy, resort suite!
High-quality faux fiddle figs or eucalyptus in a vase can fool many an eye and require zero care.
I mix real and faux sometimes – shh, our secret – a faux fern tucked up on a high shelf looks real because who can get up there to check?
Don’t forget planters. They’re like accessories for your green friends.
Ultimately, adding plants is about bringing a bit of the outdoors in.
Almost every client I’ve worked with, when we add a plant or two, they say, “Wow, I love the energy this gives.”
Rooms truly feel happier and more breathable with plants.
And taking care of them can be a soothing routine – watering day can be therapeutic, moving them about to catch sun is oddly satisfying. It makes you engage with your space in a nurturing way.
So, whether you start with one hardy pothos or go full jungle mode, I promise plants will enhance both the look and feel of your home in a way few other decor pieces can.
Whew, we’ve covered a lot of ground in part one!
From clever furniture risers, cozy textiles, and smart storage solutions to vertical illusions and small-space styling tricks—these tips are here to help you love your home even more.
Remember, decorating is meant to be fun and creative, so don’t feel rushed to do it all at once.
Pick the ideas that excite you most, whether it’s rearranging a cozy nook, refreshing your pillows, or finally styling that gallery wall you’ve been picturing.
Don’t miss part two where I’m be diving into seasonal swaps, decorative hardware upgrades, delightful home scents, and easy ways to add meaningful personal touches.
Trust me, you’ll be amazed at how these simple yet impactful changes keep your home feeling fresh and uniquely yours all year round.
Happy decorating—I’m cheering you on every step of the way!