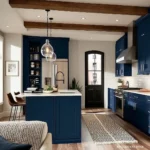
The Kitchen Rule of 3: Simple Priorities That Make Kitchens Look Expensive
If your kitchen has ever made you sigh in that specific way that says, “I love you, but you’re stressing me out,” you’re in the right place.
Because here’s the secret: most kitchens don’t look “expensive” because someone spent a fortune.
They look expensive because they feel intentional, calm, and put-together. Like the kitchen got dressed on purpose today.
And I know, I know.
The internet is full of “Just replace your cabinets!” advice.
Sure, let me just casually do a full remodel between lunch and my next load of laundry.
Instead, I want to give you a way to make your kitchen look high-end without turning your life into a renovation show.

Whether you own your home, rent your place, or you’re somewhere in between, this is about smart priorities that make a visible difference fast.
Welcome to the Kitchen Rule of 3.
Grab your favorite beverage, pen, and paper for notes; take your time to study the images, design tips, and products, and enjoy!
ps…remember to save this and come back anytime for a dose of inspo!
What the Kitchen Rule of 3 Actually Is
The Kitchen Rule of 3 is simple: pick three priorities and focus on those first.
Not twelve. Not “everything at once.”
Three.
When kitchens feel messy, dated, or just a little blah, it’s rarely because you’re missing one magical object.
It’s usually because too many things are competing for attention-different finishes, different styles, different clutter piles, different lighting vibes.
Get My Free eBook
“100 Easy Ways To Refresh Any Room All Year Round”
Your kitchen ends up looking like it’s hosting a group chat where everyone is talking at once.
The Rule of 3 quiets the room.
It gives your eyes a plan and your brain a plan.
And it gives your kitchen that “oh wow, this feels nicer” moment without needing a demo day.

Why “Three” Works So Well (And Why It Feels Like Relief)
Three is the sweet spot between “too little to matter” and “too much to maintain.”
It’s enough to create a transformation, but small enough that you’ll actually finish.
Also, three is how people naturally remember things.
When your kitchen has three clear priorities, you stop making a thousand tiny decisions every time you walk in.
You’re not reinventing the wheel every morning while you’re half-awake, making coffee.

What “Expensive” Really Means in a Kitchen
When I say “expensive,” I’m not talking fancy… like your kitchen needs to start wearing a tuxedo.
I mean elevated. Polished. The kind of space that quietly says, “Yes, someone thought this through,” even if you’re in a rental and your cabinets have survived a few chapters of life.
An expensive-looking kitchen usually has three vibes happening at once: it feels calmer (your brain can breathe), it looks brighter in a flattering way (not interrogation-room bright), and everything feels like it belongs together.
That’s the secret sauce. Calm, light, and cohesive.
And don’t worry—we can absolutely create that without a full remodel or a “guess I’ll just replace everything” spiral.
Now let’s make that happen.
The Three Ingredients of an Expensive-Looking Kitchen (Without a Remodel)
Before we get into the “tracks” of this series, I want you to know what you’re aiming for.
Because once you see it, you can’t unsee it.
Breathing Room: The “Calm Counter” Effect
The fastest way to make a kitchen look more high-end is to create a little negative space.
Not empty and sterile. Just not crowded.
Even one clear stretch of counter changes the entire vibe.
It sends the message that your kitchen has room to function and room to breathe, which reads as “nice kitchen,” even if the cabinets are basic.
If your counters are currently hosting a blender, an air fryer, a knife block, three oils, seven spices, a mail pile, and a mysterious rubber band collection, don’t panic.
We’re not judging. We’re strategizing.
Repetition: The “It Matches On Purpose” Trick

Expensive kitchens repeat shapes and finishes.
That doesn’t mean everything has to be the same.
It means there’s a pattern your eye can follow.
Maybe your metals are consistent, or your wood tones repeat in a way that feels steady and on purpose.
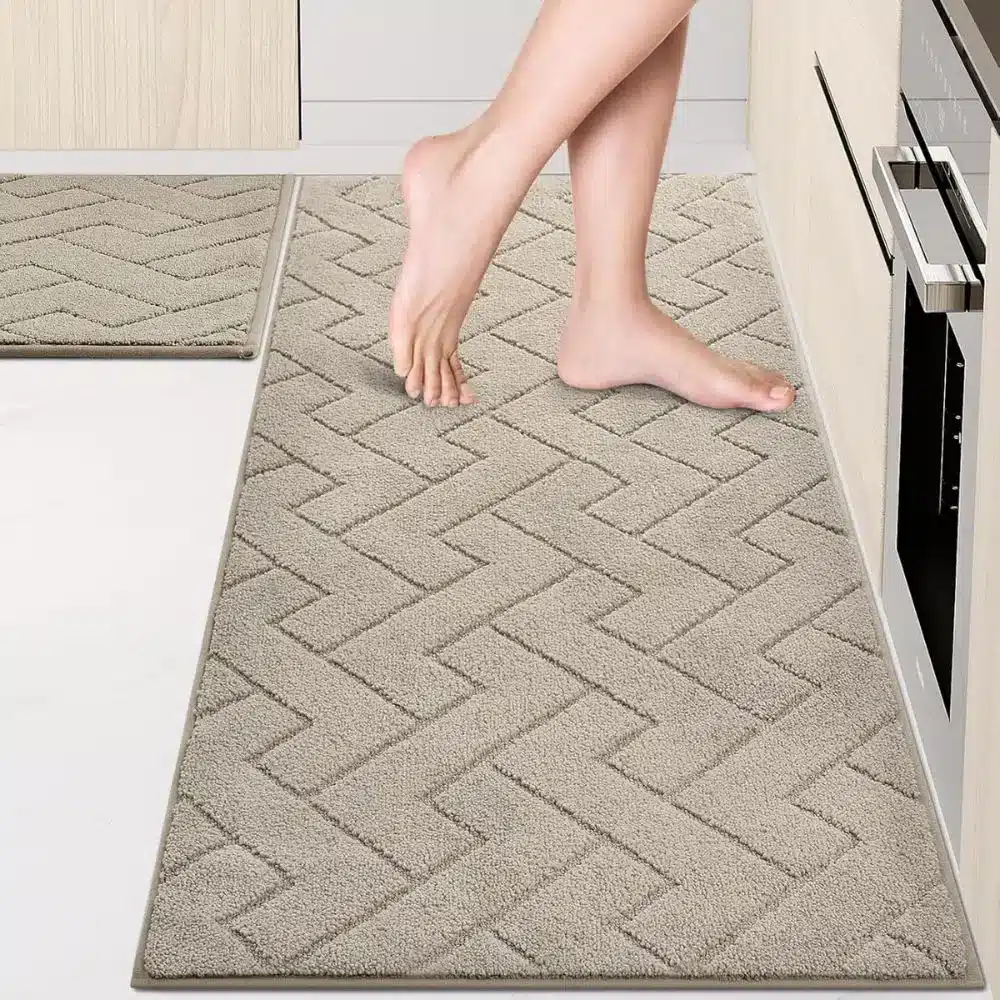
Perhaps you have matching kitchen rugs.
Maybe your black accents show up three times—like on the faucet, a light fixture, and a little countertop detail.
The counter canisters match.
Your brain spots that repetition and goes, “Ahh. This is intentional.”
Flattering Light: The “Why Does This Kitchen Look Better?” Factor

Lighting is the sneaky hero.
You can have the prettiest kitchen in the world, but if your bulbs are harsh, too cool, or uneven, the space will never look expensive.
Flattering light makes counters look cleaner, cabinets look richer, and the whole kitchen feel warmer.
It’s like a filter, but in real life, and you don’t have to hold your phone at a weird angle.
How to Choose Your Three Priorities (Without Overthinking It)

The Kitchen Rule of 3 is not about doing everything.
It’s about choosing what will create the biggest visible change for your kitchen and your daily life.
Here’s a simple way to decide. Ask yourself what makes you feel the most annoyed when you walk in.
If the kitchen feels cluttered and chaotic, your three priorities should probably involve surfaces and organization.
If the kitchen feels dark or dated, your three priorities should probably involve lighting and a few visual upgrades.
If the kitchen feels fine but not special, your three priorities should probably involve styling and cohesion.

And if you’re renting, your three priorities should lean toward reversible upgrades that don’t require drilling, painting cabinets, or getting into a debate with your landlord about “temporary” things that mysteriously look permanent.
You’re not picking your three priorities for the rest of your life.
You’re picking them for right now—for the season you’re in and the energy you have.
And that’s not settling; that’s being smart and kind to yourself.
Start Here: Rule of 3 for Kitchen Areas (Island, Countertops, Lighting)

This is the “big picture” track, and it’s the one that tends to create the fastest, most dramatic difference with the least emotional effort.
Even if you don’t have a kitchen island, don’t click away.
Your “island” might be a peninsula, a small cart, a table, or simply the main landing zone where life happens.
Every kitchen has an “anchor” surface.
That’s what we’re talking about.
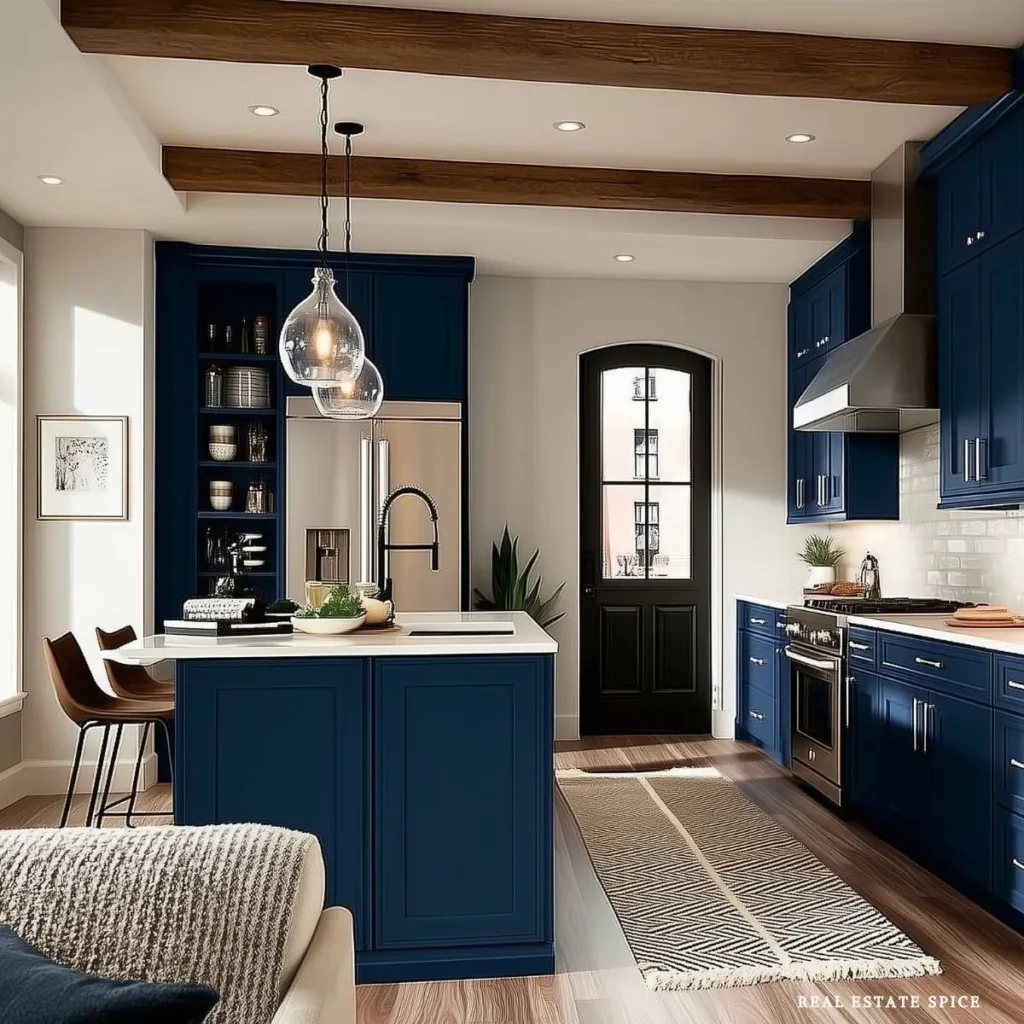
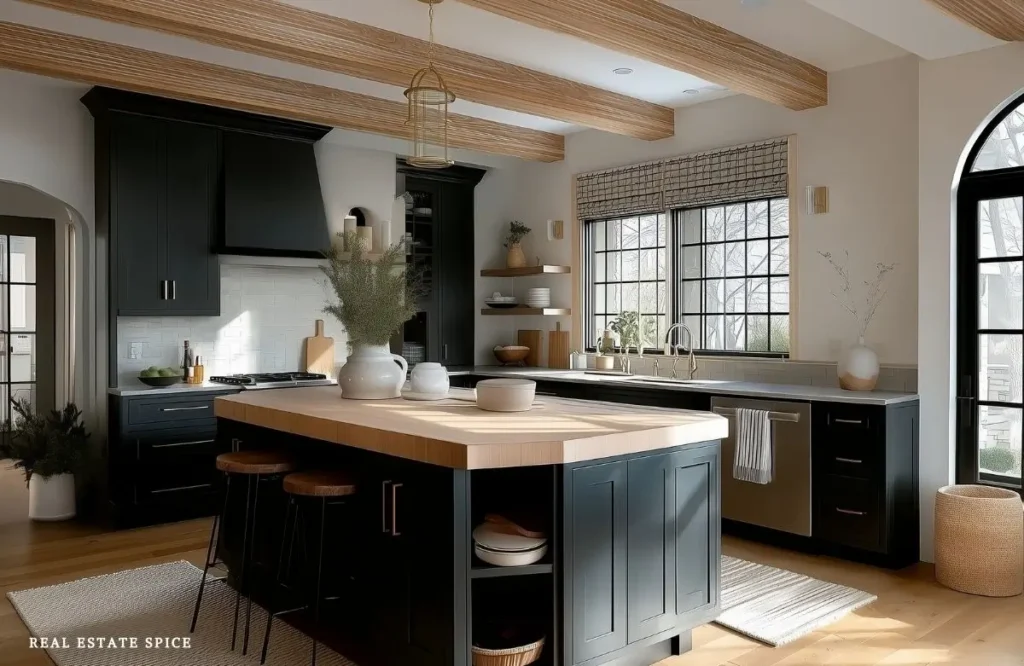
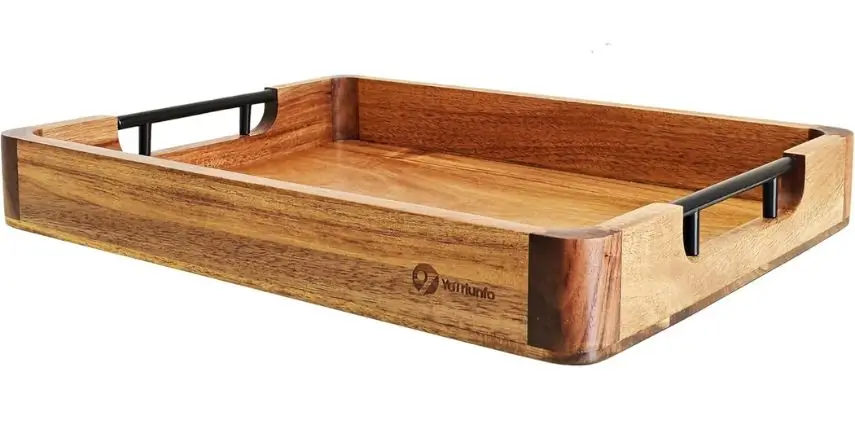
The Island: The Landing Strip That Sets the Whole Tone

The island is the kitchen’s handshake.
It’s what you see first, what you reach for first, and yes—what collects the evidence of real life first (homework, chopping, snacks, a half-charged phone, and someone asking you where the scissors are while you’re holding a hot pan).
To make a kitchen island look expensive, it doesn’t need to do one job. It just needs to look like it has a plan.
The secret is giving it gentle boundaries so multiple things can happen at once without the whole surface turning into a clutter crime scene.
Think of your island like a “two-lane road” with an anchor.
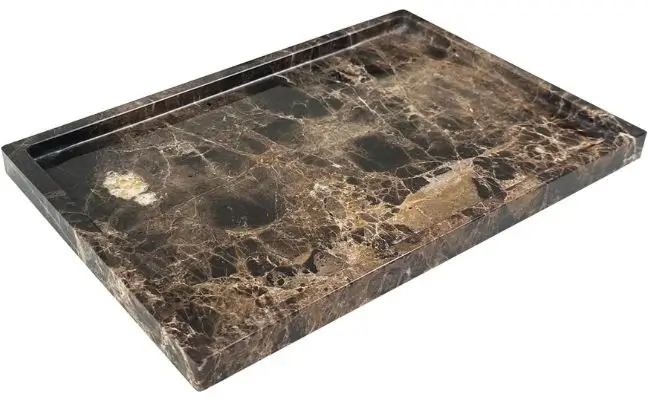
Keep one attractive, useful home-base piece that always lives there—like a tray or a shallow bowl—so the island reads styled even on a random Tuesday.
Then mentally reserve a clear strip as your prep lane, and a smaller “life lane” for the kid’s homework/visiting / snack-time reality.
When the day gets busy, you’re not trying to keep the island empty—you’re just corralling the chaos. Use trays to corral items.
That tiny shift is what makes it look intentional, lived-in, and elevated (instead of “help, what happened here?”).
The Countertops: The Secret Is Not More Decor, It’s Better Decisions

Countertops look expensive when they feel edited, not packed.
The goal isn’t to style every inch of space—it’s to make your kitchen feel easier on the eyes, like everything has a “home” and your brain doesn’t have to work overtime just walking into the room.
Here’s what actually works: pick one small spot to be your intentional little moment—maybe by the stove or by the sink—and let that area hold the “nice” stuff (a tray, a crock for utensils, a soap set that doesn’t scream bargain-bin chaos).

Then give yourself permission to keep the rest of the counter mostly clear, because that open space reads polished.
When everything is spread out, it looks like clutter—even if the items are useful.
But when you group the everyday things into one tidy zone and leave breathing room everywhere else, your kitchen instantly feels more elevated… without you adding a single extra thing.
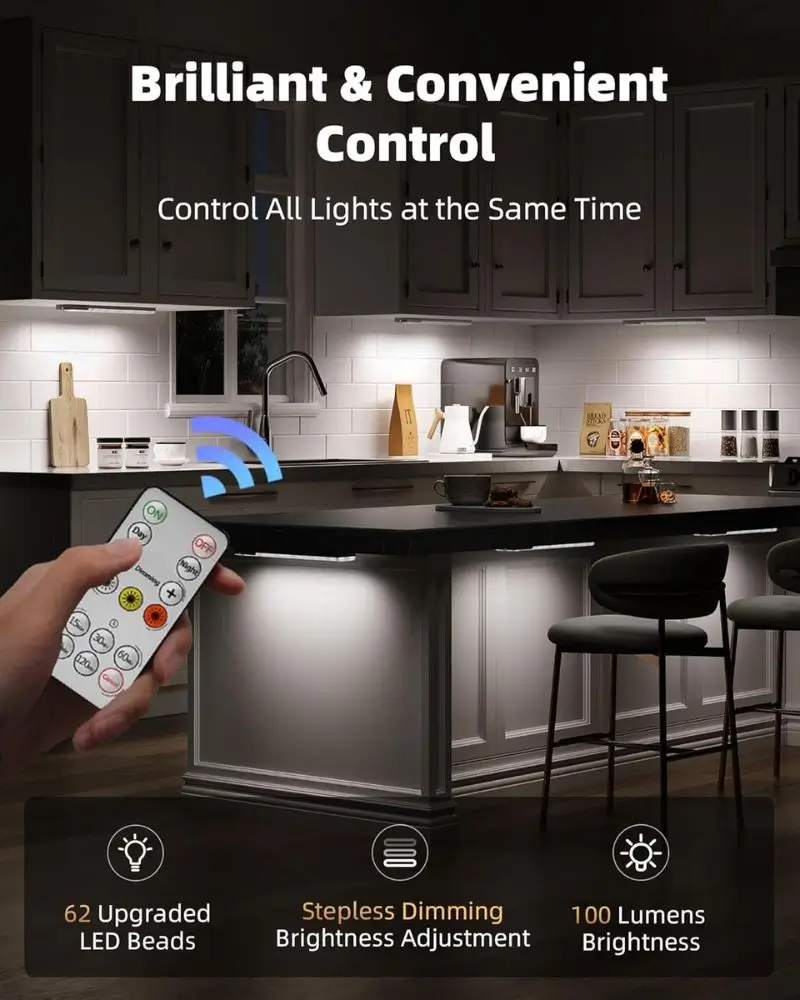
The Lighting: The “Designer Kitchen” Shortcut

If you want the quickest upgrade that makes your whole kitchen look more put-together, start with lighting.
It changes everything—colors look better, surfaces look cleaner, and suddenly the room feels like it has a plan.
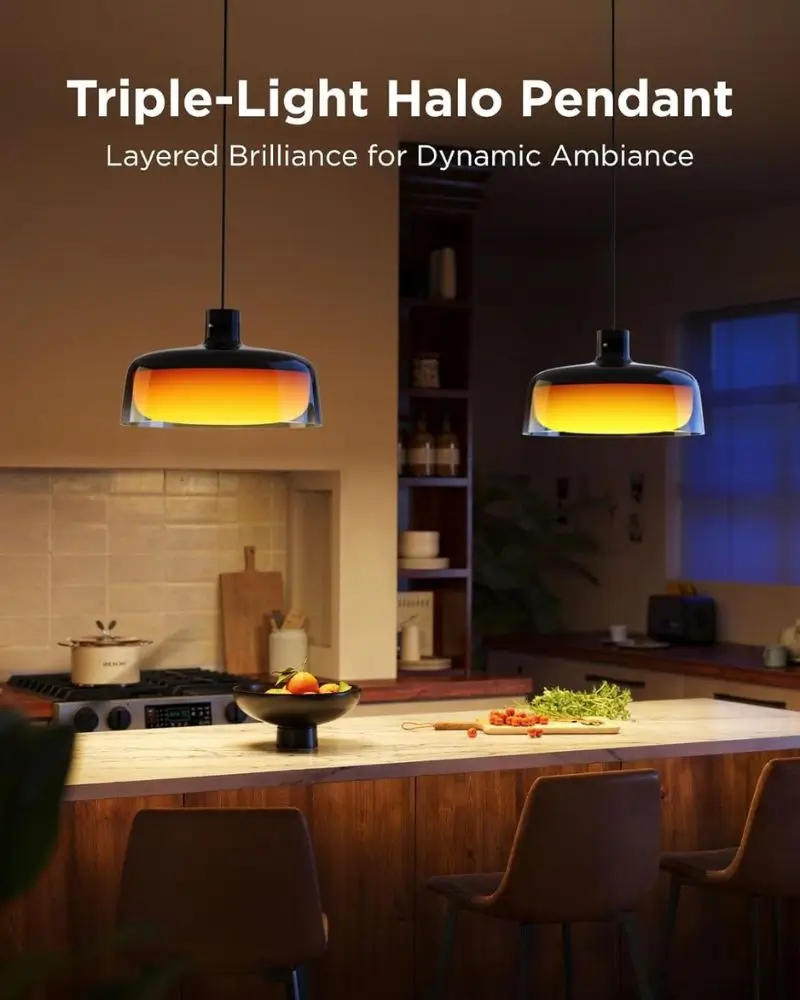
“Expensive” lighting isn’t one blinding overhead light doing all the work like it’s on a solo mission.
It’s layers: your main light for overall brightness, task lighting where you actually work (sink, counters, stove), and a softer light that warms up the room so it doesn’t feel like a science lab.
And here’s the best part: you don’t have to swap fixtures to get this look.

Start with better bulbs (warm, flattering, and dimmable if possible), then add easy upgrades like under-cabinet lights, wall sconces, or even a small lamp on a counter.

Those little layers make your counters feel calmer, and your backsplash look more intentional—like you “did something,” without actually doing a whole thing.
This is the section you’ll want when you’re ready to make fast visual progress in the biggest zones, without turning your life into a renovation project.
Next: Rule of 3 for Kitchen Organization (Pantry, Drawers, Under-Sink)

This is where “looks expensive” meets “life runs smoother,” because nothing feels high-end like opening a drawer and not getting jump-scared by a rogue whisk.
And don’t worry—I’m not about to tell you to become a minimalist or decant every noodle into matching glass jars unless that’s genuinely your love language.
This is about removing friction.
When your pantry, drawers, and under-sink area have a simple system, clutter stops multiplying on the counters… and your kitchen naturally starts looking calmer and more pulled together.
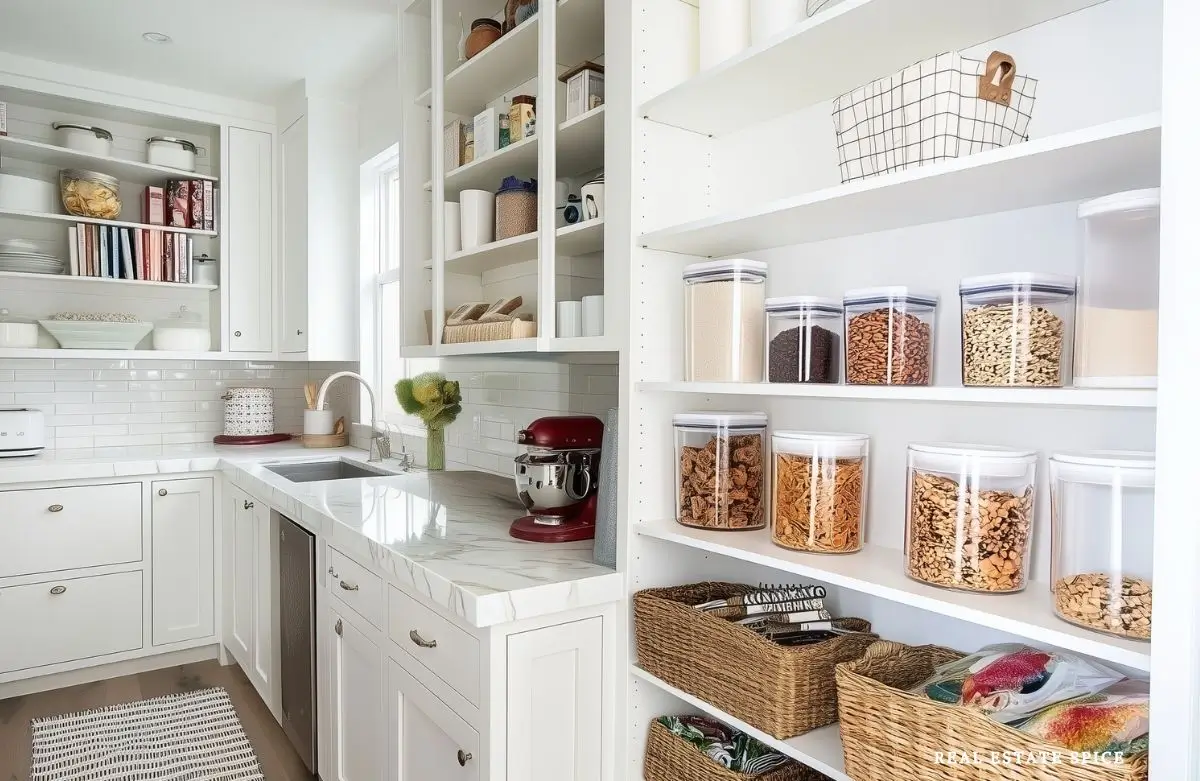
The Pantry: Make It Feel Like a Mini Grocery Store (In a Good Way)

A pantry looks expensive when it feels easy.
Like you can open the door, grab what you need, and nothing tumbles out like it’s auditioning for a disaster movie.
When your pantry has a predictable “this goes here” rhythm, you stop shoving things wherever they fit… and the chaos quiets down on its own.
The trick is organizing around how you actually live—not how a mythical, perfectly-put-together person lives.
If you make coffee every day, your coffee stuff deserves its own zone. If you pack lunches, give lunch items a home.
If your household is more “grab a snack and sprint out the door,” snacks should be front-and-center and simple to reset.
The goal is a pantry you can keep up with during your busiest week, not one that looks so pretty you’re scared to use it.
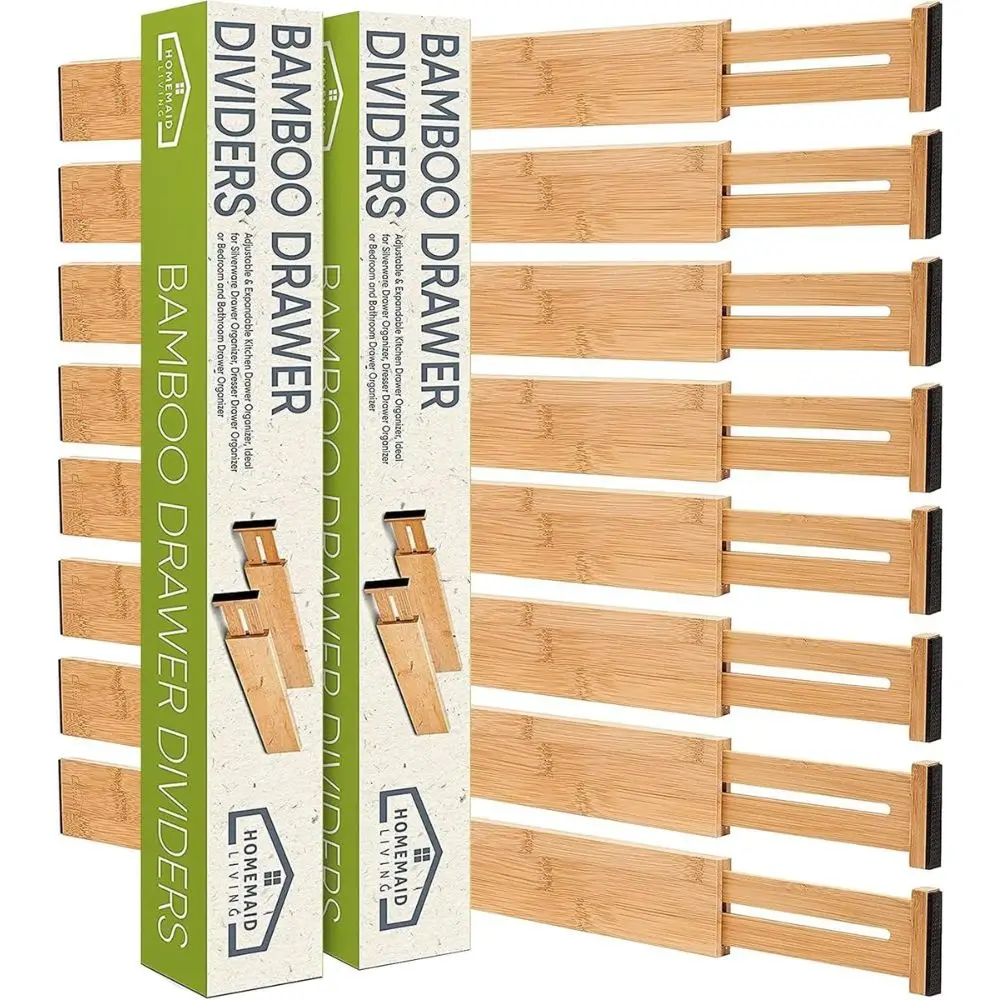
The Drawers: The “One Move, Not Five” Test

Open your most-used drawer and pay attention to what happens next.
If you have to shuffle stuff around just to grab the one thing you need, that drawer isn’t serving you—it’s quietly creating mini stress all day long.
Kitchens that feel expensive feel effortless.
So your goal is simple: the things you use the most should be the easiest to reach.
Use dividers, a simple insert, or even just a “this goes here” spot so items aren’t sliding around and playing bumper cars every time you open the drawer.
And here’s the funny part: one drawer that works beautifully can make your whole kitchen feel more premium, because suddenly you’re not fighting your space—you’re running it.
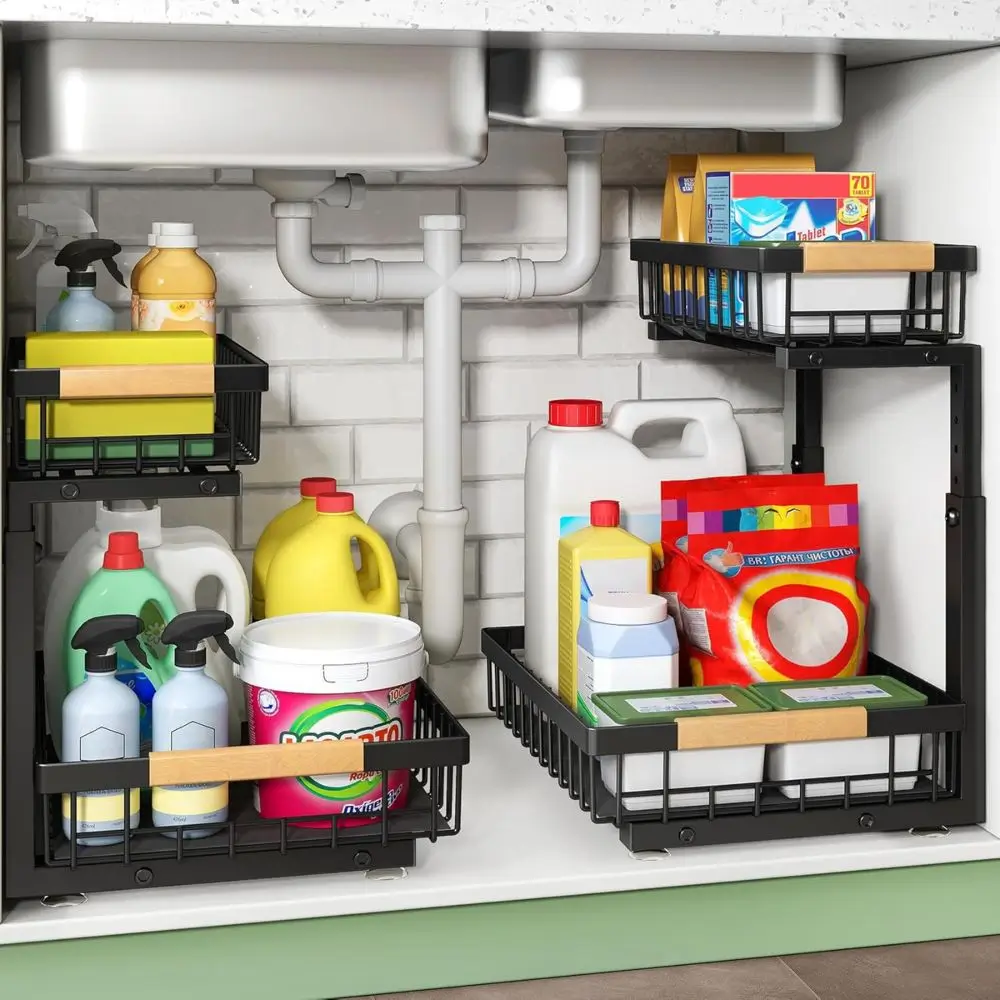
The Under-Sink Zone: The Place Where Chaos Goes to Multiply
Under the sink is where cleaning supplies go to form a messy little group chat… and somehow nobody is in charge.
This zone feels expensive when it’s clean, contained, and easy to reset.
You don’t show it off to guests, but you feel the difference every time you open that door—especially when you’re in a hurry and just need the spray bottle without knocking over twelve other things.
If you’re renting, this is one of the best “zero-permanent-change” upgrades you can make.
A couple of bins, a small caddy, and a wipeable liner instantly make it feel more polished, and anything that lifts items off the very bottom makes cleanup easier (and helps you catch leaks faster—quiet luxury, for real).
This is the kind of organization that makes your kitchen feel calmer in real life, not just in photos.
Then: Rule of 3 for Kitchen Styling (Declutter, Light, Style)
Styling isn’t about turning your kitchen into a magazine set where everyone’s afraid to set down a cup. It’s about adding a few intentional touches so the space feels settled—like it has a point of view—rather than looking like you’re halfway through getting your life together.
This is perfect if your kitchen already works fine, but it’s missing that “pulled-together” feeling that makes it look more polished without doing anything dramatic.
Declutter: The Counter Reset That Changes Everything

There’s a reason “clear counters” is the oldest kitchen tip in the book—it works every single time.
But the real trick isn’t just putting things away.
It’s choosing what earns a spot out in the open, and making sure those items look good and get used, so your kitchen feels elevated even if it’s small.
If you only focus on one area, make your sink zone feel intentional—because the sink is basically the kitchen’s face.
When that area looks tidy and cohesive, the whole room looks better… even if there are cereal bowls in the dishwasher.
Allegedly.
Light: Make Your Kitchen Look Good at Every Hour

We already talked about lighting as an upgrade, but when it comes to styling, lighting is all about mood.
It’s the difference between “this kitchen feels pulled together” and “why does my kitchen look like it’s about to ask me where I was on the night of the crime.”

A kitchen that reads expensive at night has soft layers.
You want gentle light that makes everything look warmer and calmer—especially at 9 p.m. when you’re grabbing water, trying not to step on a Lego, and pretending your life is very put together.
And in rentals (where overhead lighting can be a little aggressive), one warm, low light source—under-cabinet lights, a plug-in option, or a tiny lamp—can make the whole space feel more designed.
Style: One “Moment” Beats Ten Tiny Things

A very common styling trap is scattering little decor everywhere.
A bunch of small items tends to read as clutter, even when they’re cute.
It looks busy, not intentional.
Kitchens that feel elevated usually work the opposite way: one clear moment that looks chosen, and then the rest of the space supports it.
That “moment” can be a tray, a cookbook stand, a bowl of fruit, a small plant, or a pretty cutting board leaned against the backsplash.
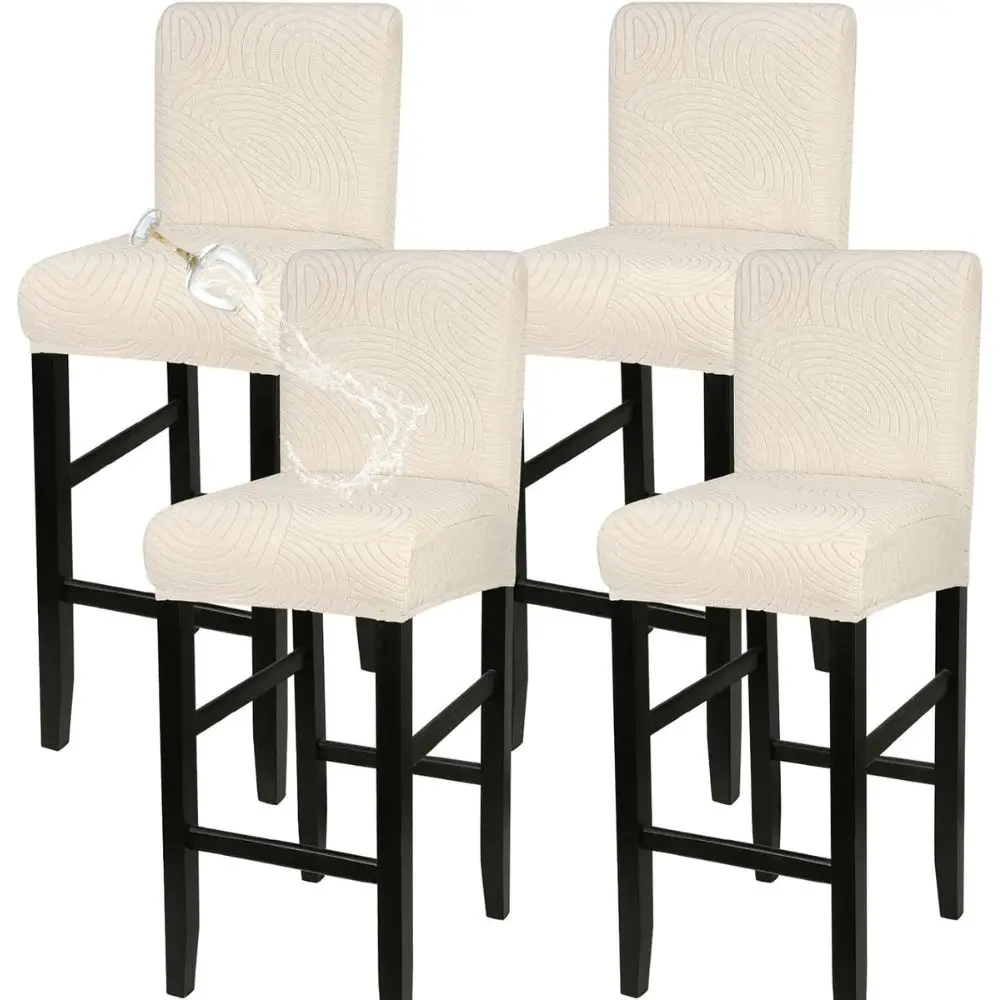
Maybe it’s new chairs or bar stools for the island. Maybe it’s new chair covers.
I covered my barstools with these, and I love them! It changed the entire look of my island area.
The goal is simple: it should look like it belongs there on purpose—not like it wandered in and decided to move in permanently.
If you’re craving that “I love my kitchen again” feeling, this is how you get it without buying a bunch of random decor you don’t need (and then having to dust it forever).
The Quiet Luxury Kitchen Trick Nobody Talks About
Here’s the angle almost nobody mentions, and it’s a total game-changer: a kitchen feels expensive when it feels good to use, not just when it looks good in photos.
Make It Sound More Premium

High-end kitchens are quieter.
Cabinets don’t slam.
Drawers don’t screech.
Things don’t rattle like you’re opening a percussion section.
If you want your kitchen to feel instantly more premium, pay attention to sound.
Soft-close add-ons, little bumpers, felt pads, and drawer liners are tiny upgrades that make a big difference.
When the kitchen is calmer and quieter, your whole nervous system notices—especially in a small space.
Make It Feel Better in Your Hands
This is the “hand-feel” factor, and it matters because you touch these things all day.
A solid soap dispenser instead of a crinkly plastic bottle.
A dish towel that looks nice enough to leave out.
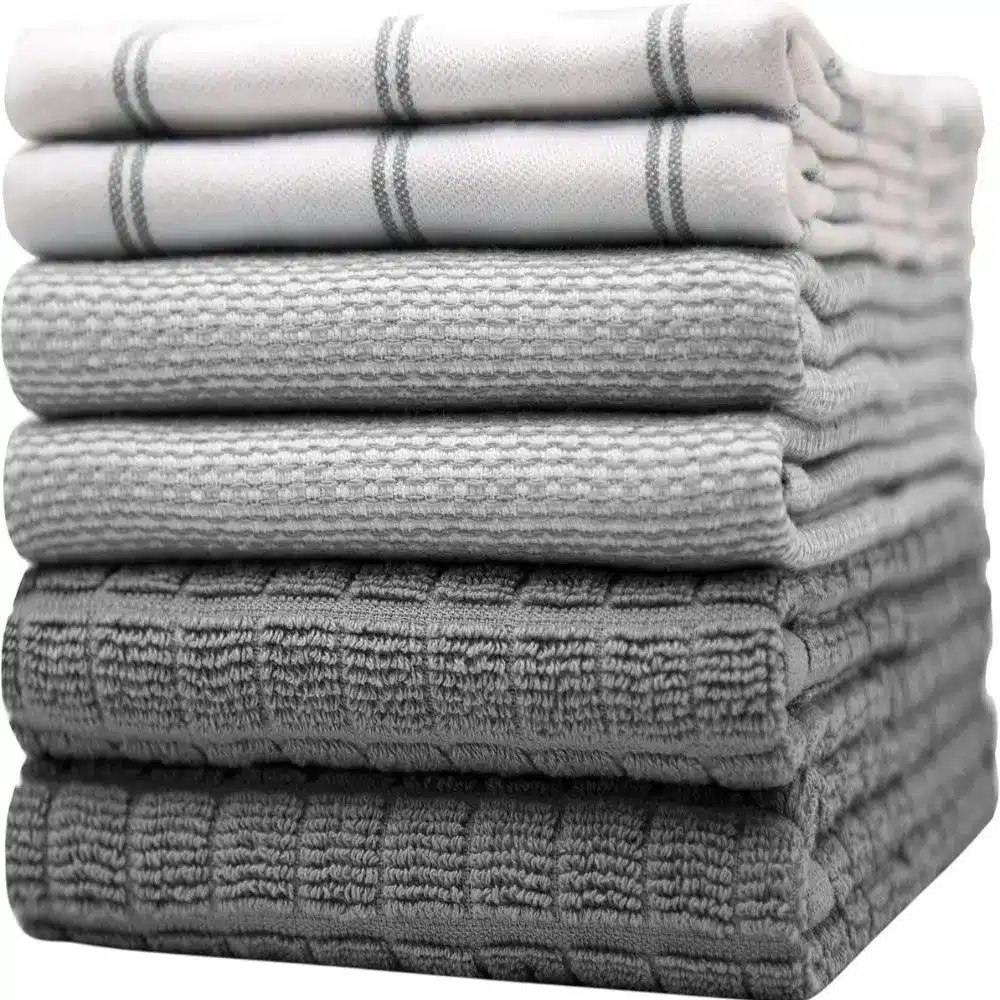

A sturdy drawer pull that doesn’t wiggle.
A cutting board that looks intentional instead of looking… tired.
You’re not “decorating.” You’re upgrading the experience of being in your kitchen. And honestly? That’s the kind of luxury that actually sticks.
A 3-Hour Kitchen Refresh Plan You Can Actually Pull Off
You don’t have to overhaul the whole kitchen to feel a difference.
You just need a plan that doesn’t spiral into “I started wiping counters, and now I’m reorganizing my spice drawer at midnight.” (But, Jaymie… we’ve all been there.)
Step 1: Reset the Visual Noise

Start with the surfaces your eyes land on first: counters, island, and the area around the sink.
Put away what doesn’t belong, relocate what you don’t use daily, and wipe down what you can.
This is the moment your kitchen starts to breathe again. If you want the fancy version of this step, do a quick “line check.”
Neatly lined-up items look intentional. The same items scattered around look chaotic.
Same kitchen—completely different vibe.
Step 2: Make One Area Match Itself

Pick one spot. Just one. The sink area, coffee zone, stove zone, or a corner of the island.
Now make that spot match itself: similar containers, repeated tones, and a simple arrangement that feels steady.
This is where your kitchen starts to look styled instead of just “clean-ish.”
Step 3: Add One Layer of Better Light
If your lighting feels harsh, cool, or uneven, this is the step that levels everything up.
Swap to warmer bulbs if needed, then add one extra light source if you can—under-cabinet lighting, a plug-in light, or a small lamp tucked into a corner.

That softer layer makes the kitchen feel calmer at night and more polished during the day.
When the light is right, everything else looks more expensive—even your countertops.
When you step back, the kitchen won’t look perfect. It’ll look like it has a plan. And that’s the whole goal.
Rule of 3 Mistakes That Make Kitchens Look Cheaper (And How to Fix Them)

Even if your kitchen has good bones, a few sneaky things can drag the whole look down.
The good news?
These are usually quick fixes.
The Light Is Too Cool or Too Harsh
If your kitchen feels like it’s lit by a giant blue flashlight, it’s going to look colder and less polished.
Warmer, softer light makes everything look better—your counters, your cabinets, and yes… you too.
The Counters Are Doing Too Much
When every inch of counter is occupied, the kitchen looks smaller and busier.
You don’t need empty counters—you just need a little breathing room and one clear “moment” that looks intentional.
The Finishes and Materials Feel Random
Mixing metals can be beautiful when it’s done with a plan.
It looks accidental when nothing repeats.
A simple rule: pick your main metal tone and make sure it shows up more than once, so your eye reads it as cohesive.
The Decor Is Tiny and Scattered
Lots of small pieces spread around tend to look like clutter.
One larger, intentional piece—or one styled moment—usually looks calmer and more elevated.
The room instantly feels more settled, like it knows what it’s doing.
Where to Go Next From This Hub
This hub is your home base.
When you want your kitchen to look more expensive, come back here, choose your three priorities, and follow the track that matches your real life.
If you want the biggest visible change fast, start with the Rule of 3 for kitchen areas and focus on the island, countertops, and lighting.
If you want that daily calm-and-functional upgrade, go to the Rule of 3 for kitchen organization and tackle the pantry, drawers, and under-sink zone.
If you want your kitchen to look finished and feel cozy, go to the Rule of 3 for kitchen styling and focus on decluttering, better light, and one intentional style moment.
And if you want a tiny nudge from me, friend to friend, here it is: pick your three, and don’t let your brain talk you into picking seven.
Three is enough to change the whole feel of your kitchen.
Don’t miss the next installment: The 3 Kitchen Areas That Make Your Kitchen Feel “Designer” Without the Drama (Island, Countertops & Lighting)
Get My Free eBook
“100 Easy Ways To Refresh Any Room All Year Round”
Kitchen Rule of 3 FAQ
Can I use the Kitchen Rule of 3 in a rental?
Absolutely. In fact, rentals are where this shines. Focus on lighting, organization, and styling. Those are renter-friendly upgrades that don’t require permanent changes, but they make the kitchen feel dramatically better.
What if I don’t have a kitchen island?
No problem. Your “island” is just your main landing zone. It could be a peninsula, a cart, a table, or the counter space you use most. The idea is to choose the area that anchors the room and make it feel intentional.
How do I make my kitchen look expensive on a budget?
Prioritize the things that change the feel of the whole room: better light, calmer surfaces, and cohesive finishes. A few intentional upgrades beat a bunch of random purchases every time.
What’s the fastest upgrade that makes the biggest difference?
Lighting is usually the fastest and most dramatic. The right bulbs and a little extra layer of light can make cabinets, counters, and finishes look instantly more elevated.
How do I keep it looking nice if my kitchen is always in use?
You don’t need a perfect kitchen. You need a reset routine that’s realistic. Give key items a home, keep one “pretty zone,” and make sure your main surfaces can be cleared quickly. A kitchen that’s easy to reset will look nicer more often, without you feeling like you’re constantly cleaning.
Do I have to follow all three tracks?
Nope. This is your kitchen. Start with the track that solves your biggest annoyance. If clutter stresses you out, start with organization. If the kitchen feels dated, start with areas and lighting. If it feels fine but bland, start with styling. You can mix and match too, as long as you keep your focus to three priorities at a time.
Don’t miss the next installment: The 3 Kitchen Areas That Make Your Kitchen Feel “Designer” Without the Drama (Island, Countertops & Lighting)