The 3 Kitchen Areas That Make Your Kitchen Feel “Designer” Without the Drama (Island, Countertops & Lighting)
If you’ve ever stood in your kitchen holding a coffee (or a snack you swear is “not really a snack”) and thought, “Why does this space feel… blah?”—I got you.
Most kitchens don’t need a full remodel to have that expensive, put-together, “wow” designer look.
They need clarity, a simple plan, and you giving yourself permission to stop trying to fix seventeen things at once.
Pick these three areas that quietly run the whole show, and watch how fast the whole kitchen starts to feel more pulled together.
This is Installment #1 in my Kitchen Rule of 3 series, and it’s the best place to start if you want the biggest “wow, this looks nicer” change with the least amount of chaos.
Now let’s make your kitchen look designer-expensive on purpose, an area you and your family love to spend time, and functional too.
Before We Start: What Counts as an “Island” in Real Life

If you have a big, gorgeous island, congratulations, and also please invite me over.
But if you don’t, you still have an “island” in your kitchen.
Your “island” is whatever surface acts like your kitchen’s landing strip.
It might be a peninsula, a small table, a cart, or that one stretch of counter that somehow becomes the default drop zone for mail, backpacks, and three rogue water bottles.
We’re calling it the island because it’s the anchor.
It’s the place your eyes land first, and it sets the tone for the entire kitchen.
When the anchor looks intentional, the whole room looks more intentional.
That’s the magic.
Grab your favorite beverage, pen, and paper for notes; take your time to study the images, design tips, and products, and enjoy!
ps…remember to save this and come back anytime for a dose of inspo!
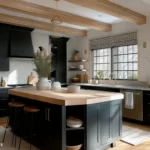
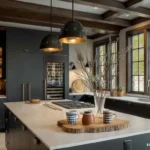
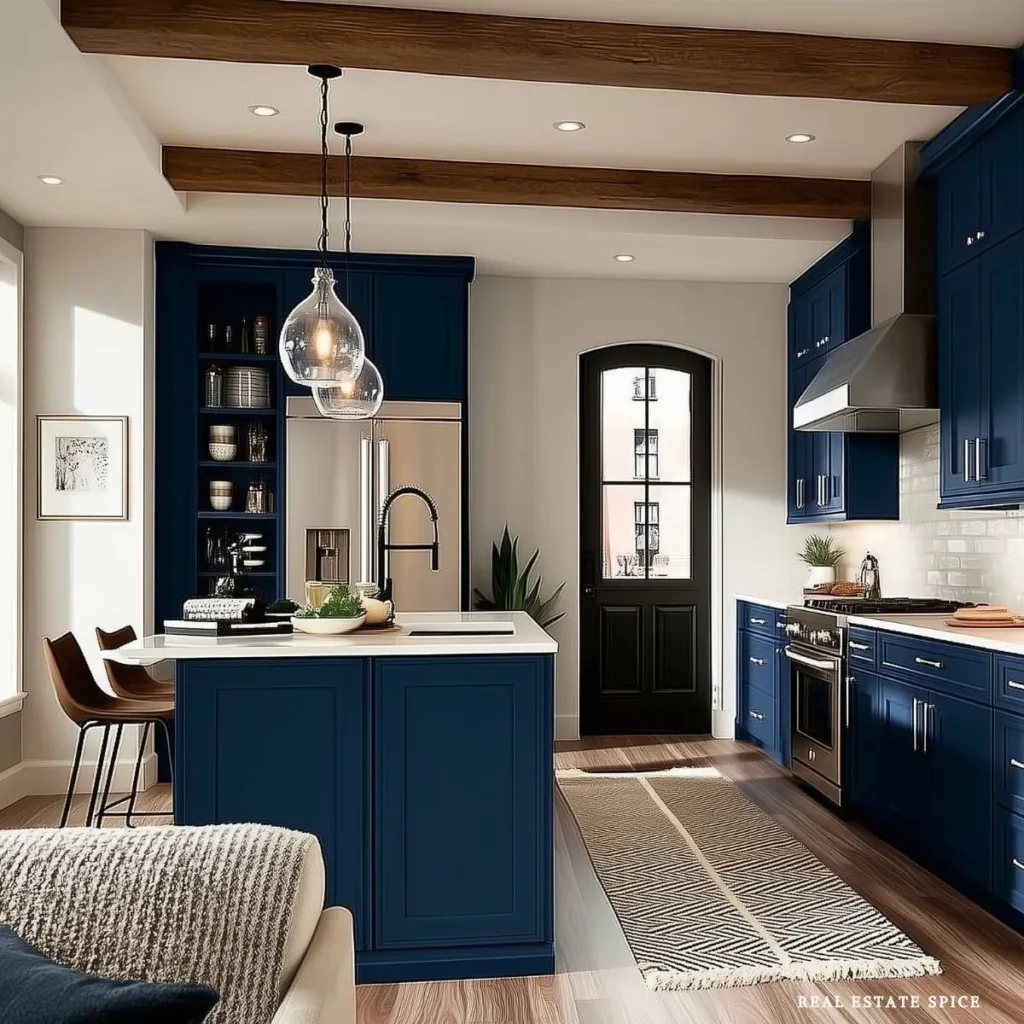
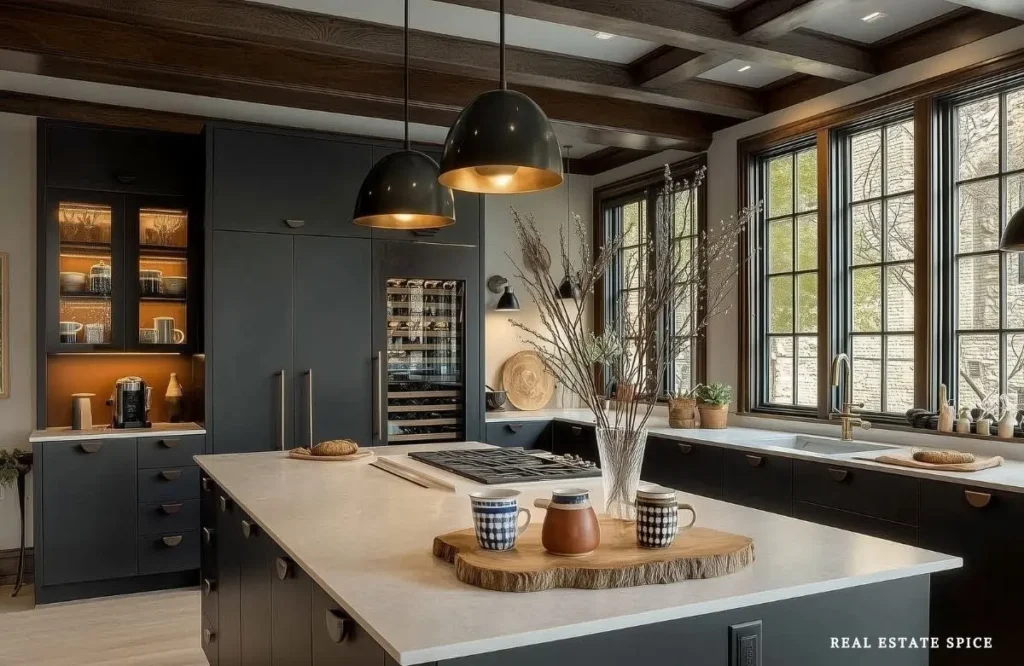
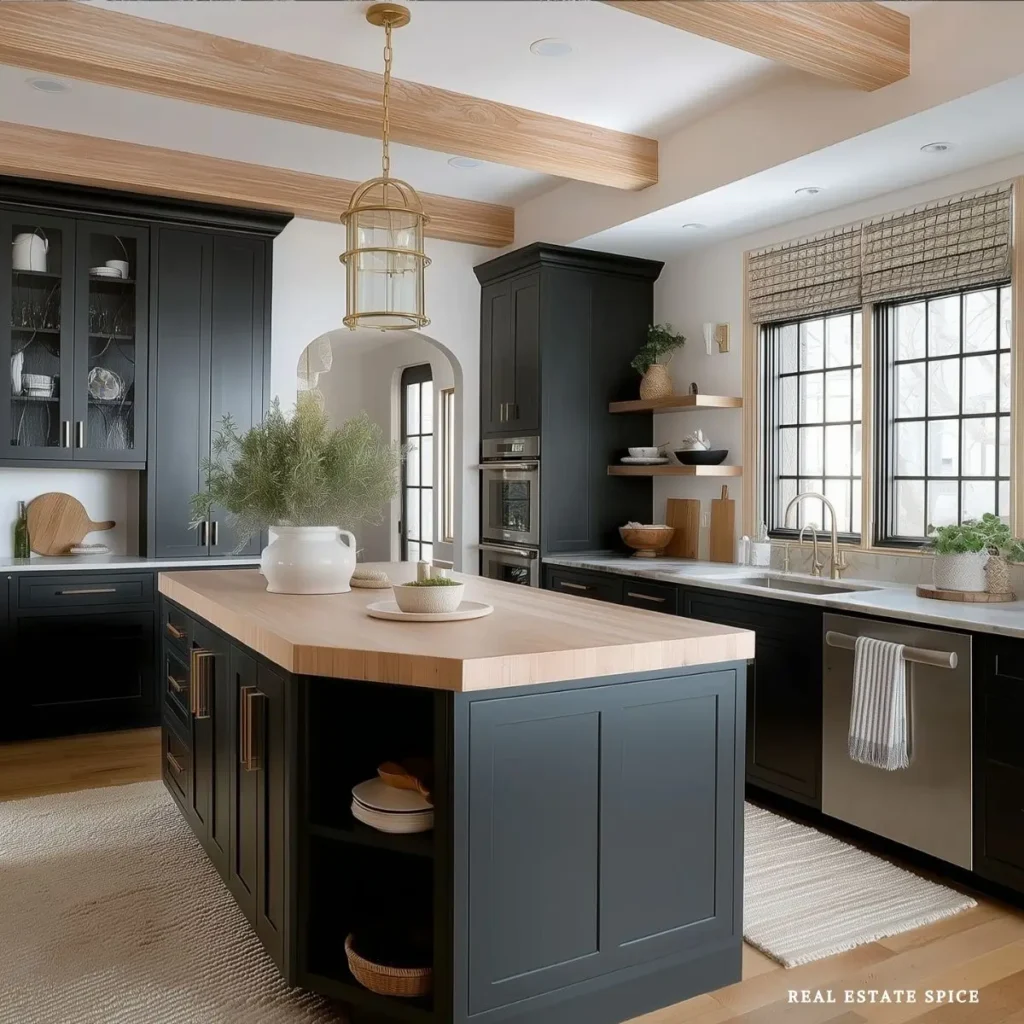
Area 1: The Island (Or Your Main Landing Zone)
This is where the “designer” feeling often starts, because the island is usually the most visible surface and the most used surface.
It’s the kitchen’s center of gravity.
Get My Free eBook
“100 Easy Ways To Refresh Any Room All Year Round”
The One Thing That Makes an Island Look Designer Expensive: A Simple System
Here’s the truth: your island isn’t just a surface.
It’s the hub.
It’s where life lands—coffee, chopping, homework, visiting, mail, snacks, and the occasional “why is this screwdriver here?” moment.
So the goal isn’t to force your island into one job.
The goal is to make it look intentional while it multitasks, because that’s what expensive kitchens actually do well—they handle real life without looking overwhelmed by it.

My favorite approach is the Anchor + Lane method.
Keep one attractive, useful “anchor” item that always lives on the island (a tray, shallow bowl, or a simple caddy), and treat it like the island’s home base.
Then leave a clear “lane” next to it for prep and daily life.
That way, your island can still be the command center, but it doesn’t read like a clutter explosion.
When everything is loose, it looks messy.
When the same items are gathered into one home base and the rest have breathing room, the island looks polished—even if dinner prep and math homework are happening at the same time.
And that’s the real flex: a kitchen that looks expensive because it’s designed for how you actually live.
The “One Anchor” Styling Trick That Keeps You Sane

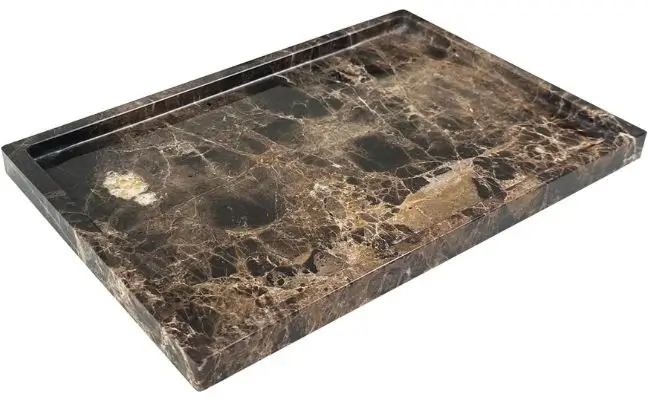
If you only do one thing to make your island look more expensive, do this: give it one anchored “home base” item.
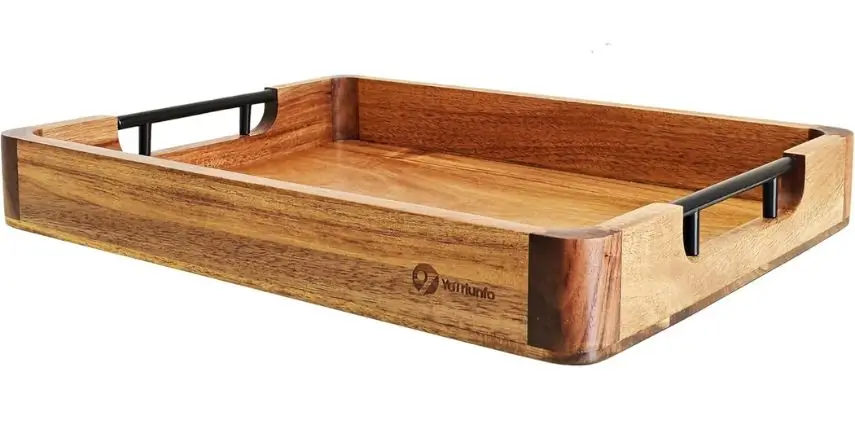
A tray works beautifully because it collects the small stuff and makes it look intentional.
A bowl works too, especially if your household always has keys, sunglasses, or random little items that appear out of thin air.
The expensive part isn’t the tray. The expensive part is the boundary.
When you give clutter a contained place to land, the rest of the island stays visually calmer. And calm reads expensive.
If you want to take it up one notch, choose an anchor that matches your kitchen vibe.
Stone or marble-look feels polished.
Wood feels warm and cozy.
Matte black feels modern.
Woven textures feel casual and welcoming.
Your anchor sets the style tone without you needing to “decorate” your whole kitchen.
The Island Shape-Shifter: How to Keep It Styled and Still Use It

Real talk: your island has to work.
So instead of styling it like a magazine, style it like a real human who cooks, lives, and still wants the kitchen to feel pulled together.
My favorite setup is a “one anchor + quick reset” island.
Keep one intentional piece that always stays—like a tray, a shallow bowl, or a simple caddy—so the island looks styled by default.
Everything else should be easy to sweep into that anchor, move to the sink, or slide to a nearby counter when it’s time to prep and the island needs to earn its keep.

And here’s the sneaky win: this is a confidence boost.
When you can reset the island in under a minute, your kitchen looks nicer more often, and it starts feeling more expensive in real life—not just on the days you have time to “style” anything.
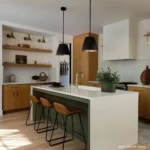
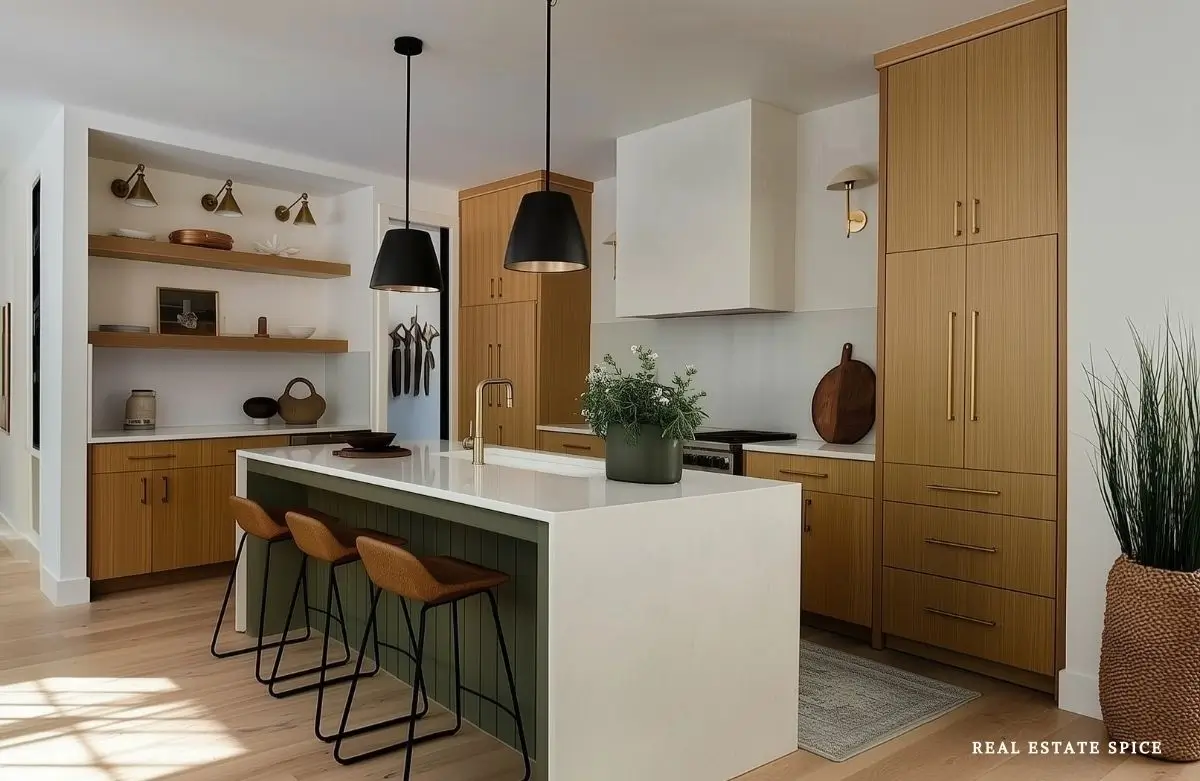
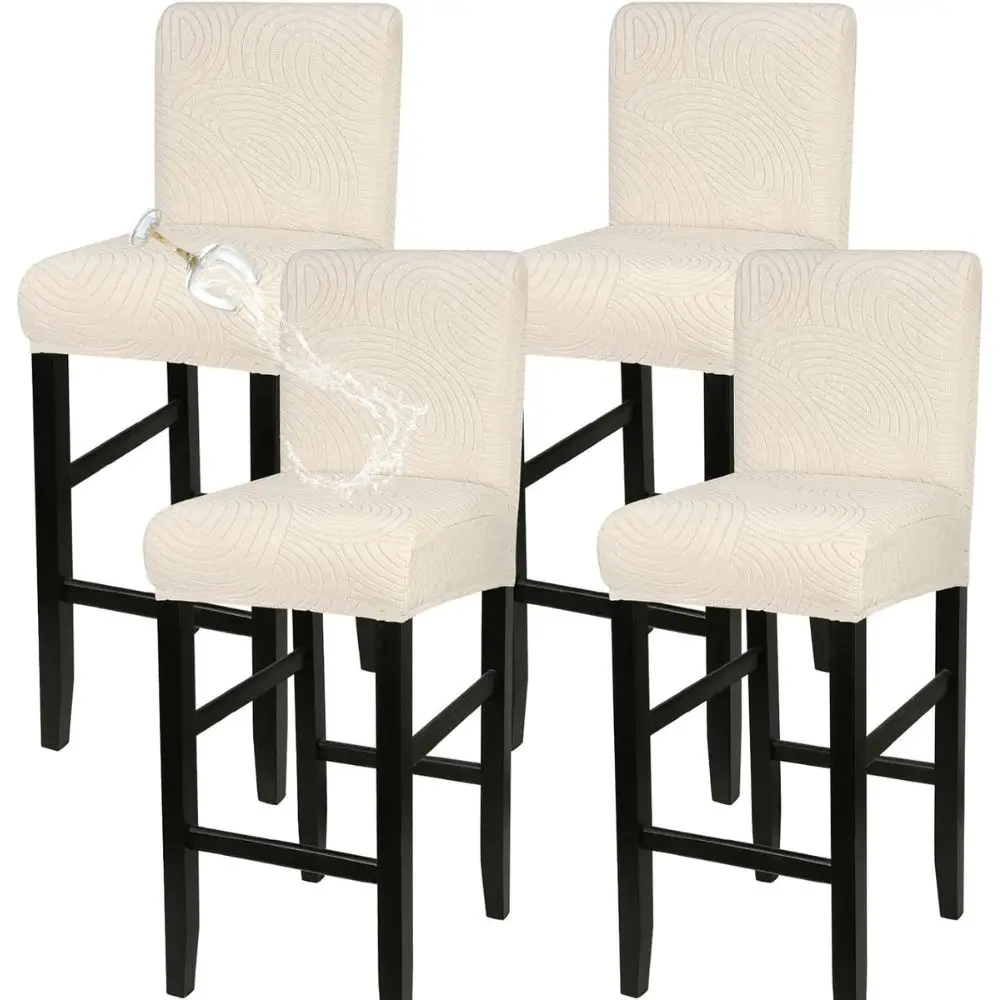
Seating That Looks High-End (And Doesn’t Feel Like a Wobble Situation)

If your island has seating, bar stools matter more than people realize.
They’re like shoes on an outfit. If the shoes are weird, the whole look gets weird.
The two things that make stools look expensive are scale and consistency.
Scale is about making sure they fit the space.
Too big and everything feels cramped.
Too small and it feels like doll furniture.
If you can, measure the height from the floor to the underside of the counter and choose stools that give you comfortable legroom.

If you’ve ever tried to sit at a counter and felt your knees immediately file a complaint, you already understand why this matters.
Consistency just means your stools relate to each other.
Change or update your bar stool covers. It can completely change your kitchen’s look and feel.
I covered my barstools with these, and I love them! It changed the entire look of my island area.
They don’t have to match perfectly, but they should look like they were invited to the same party.
Aim for one repeating detail—like the same finish, similar lines, or the same general shape.
When your eye sees that connection, the whole island instantly feels more put together.
And if you want a sneaky upgrade that makes inexpensive stools look more expensive, think texture.
A stool with a bit of woven detail, a softer seat, or a wood tone that repeats somewhere else in the kitchen instantly elevates the whole scene.
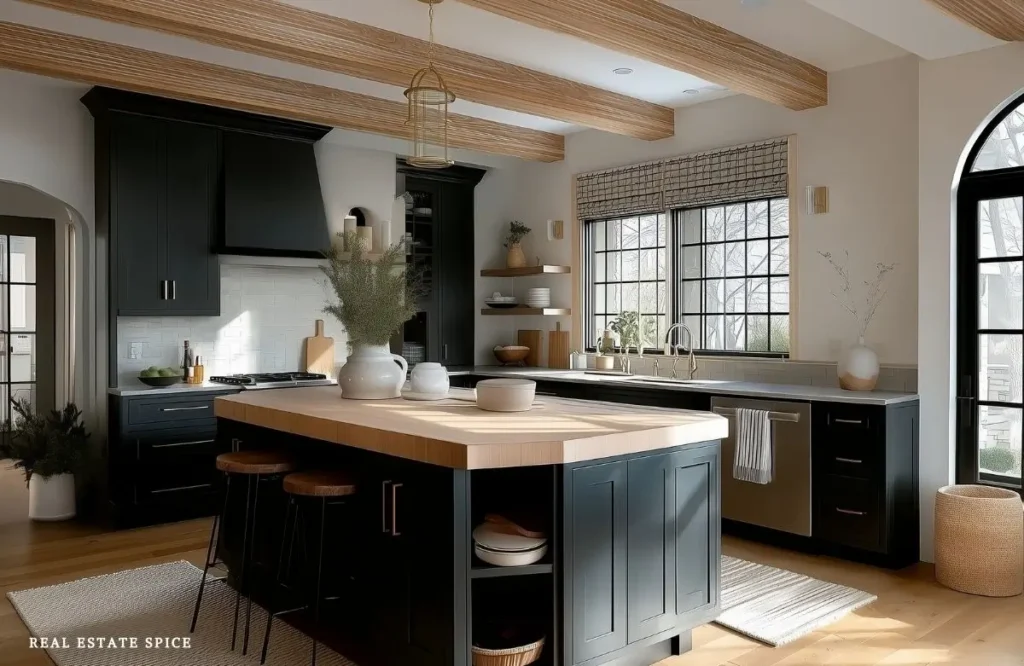
Island Lighting: The Jewelry Moment That Changes Everything

Kitchen island lighting is the kitchen’s jewelry.
It’s the thing that can make a basic kitchen feel designer without touching the cabinets.
The mistake people make is picking lighting that’s trendy but not right for the space.
Lighting has to be scaled properly, and it has to work with the ceiling height and the size of the island.
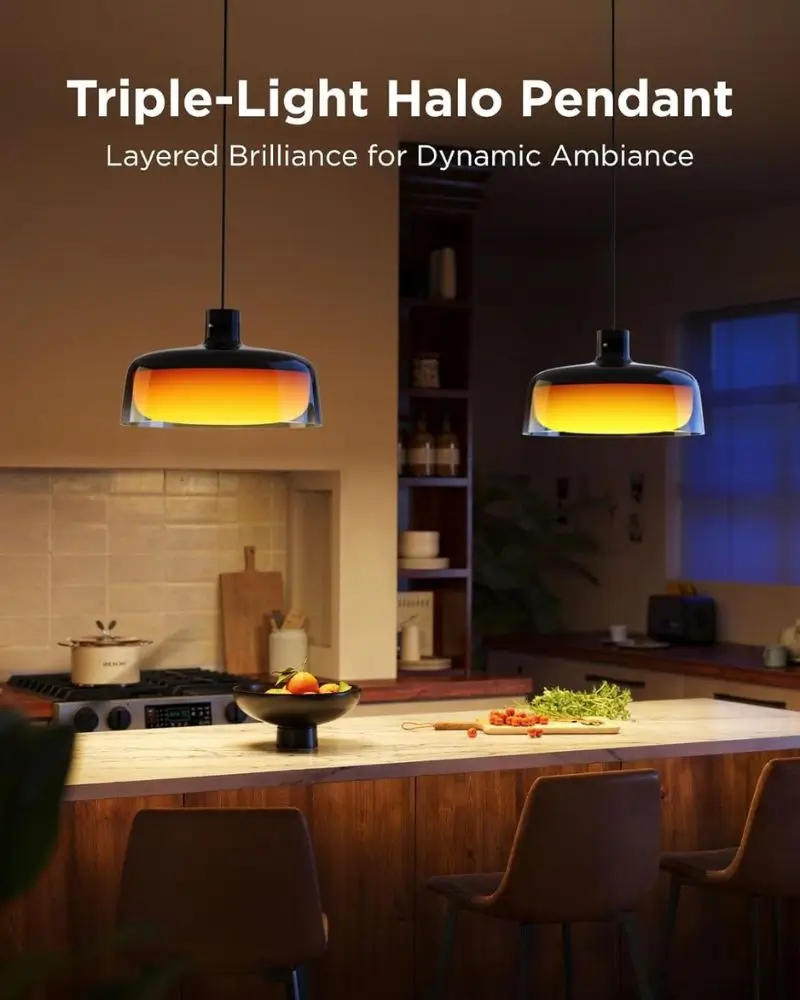
Too small looks dinky, and too big looks like the fixture is about to start charging rent.
In this installment, think of this section as the “what changes everything” plus the quick wins.
A quick win that’s wildly underrated is making sure your island lights feel centered and intentional.
Even if it’s just a small portable table lamp…it makes a difference.

Even when you can’t move wiring, you can often create a more balanced look with the right fixture shape and the right bulb warmth.
And yes, bulb warmth matters.

More on that in the lighting section, because it deserves its own spotlight.
Pun absolutely intended.
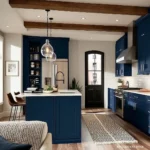
Area 2: Kitchen Countertops (Where Kitchens Get Messy and Also Where Kitchens Get Gorgeous)

Countertops are where kitchens live.
They’re also where visual chaos tends to happen first.
Which is why countertops are one of the fastest ways to make a kitchen look more expensive without changing anything big.
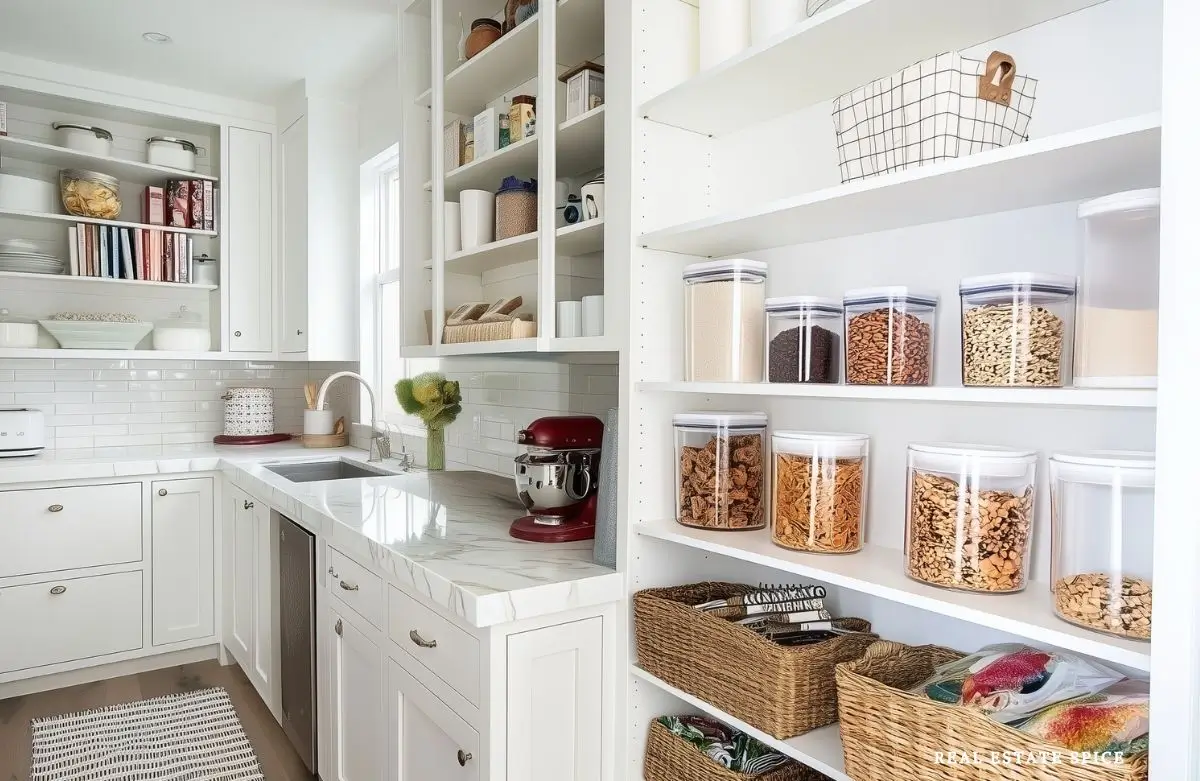
The Calm Counter Rule: Clear Space Is a Luxury

This might sound dramatic, but a clear counter is basically a luxury experience.
Even high-end kitchens can look cheap if every surface is crowded.
And even small kitchens can look expensive if the counters feel calm and purposeful.
The goal is not to have empty counters.
The goal is to have breathing room. Perhaps a few beautiful counter canisters to hold items

Try this mindset shift: your counter doesn’t need more stuff.
It needs fewer decisions.
When the counter is covered, your brain reads it as unfinished.
When there’s space and organization, your brain reads it as intentional.

Pick One “Pretty Zone” and Let It Carry the Room
This is one of my favorite tricks because it’s so doable.
Choose one spot on your counter to be the “pretty zone.” Just one.
The coffee area, the sink area, or the stove area are great choices because they’re natural focal points and they get used daily.
Then make that zone look like it belongs together.
You’re aiming for a little moment that looks styled, not scattered.
A classic example is the sink zone.
If your dish soap is in one random bottle, your hand soap is in another random bottle, and there’s a sponge that looks like it’s been through a war, the whole kitchen instantly feels less expensive.
If the sink zone looks cohesive and tidy, the whole kitchen lifts.
This is why I love focusing on the sink zone first. It’s an easy win.
And, it’s the kitchen’s face.
If the face looks put together, people assume the rest is too.
And if you live there, you get that nice little “ahh” moment every time you walk in.
The “Hide the Plastic” Trick (Without Becoming a Minimalist)

I’m not here to take away your convenience. I’m here to make convenience look put together.
A lot of kitchens start looking “cheaper” when the counters get visually loud—bright plastic, loud labels, mismatched packaging, and five different bottles all screaming for attention at the same time.
Nothing is wrong with any of it… it just creates that busy, cluttered feeling that makes the whole kitchen look less polished.
If you want a more expensive look fast, decant just a few high-visibility items. Not everything.
Just the things your eyes land on first—soap by the sink, olive oil by the stove, coffee or sugar on the counter, maybe a utensil crock.
When a few everyday items look intentional, the whole kitchen starts to look intentional.
And you didn’t have to overhaul your pantry or become the kind of person who owns twelve matching jars.
Unless that’s your thing…no judgment. I fully support your jar obsession.
The Appliance Situation: How to Keep the Counter From Looking Like a Warehouse

Small appliances are amazing. I so love convenience. I also love not looking at seven appliances at once.
If your counter is crowded, try choosing a “daily use” appliance limit. Not a rule for life, just a rule for your sanity.
Keep the things you truly use constantly, and relocate the rest to a cabinet, pantry shelf, or a dedicated appliance zone.
If you don’t have cabinet space, this is where a cart or a tucked-away or corner shelf can act like a mini appliance garage.
The goal is to reduce the visual jumble on the main counters.
The “Designer” kitchens feel calmer because the counters aren’t screaming for attention.
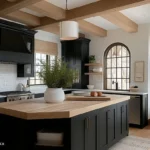
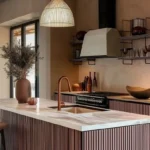
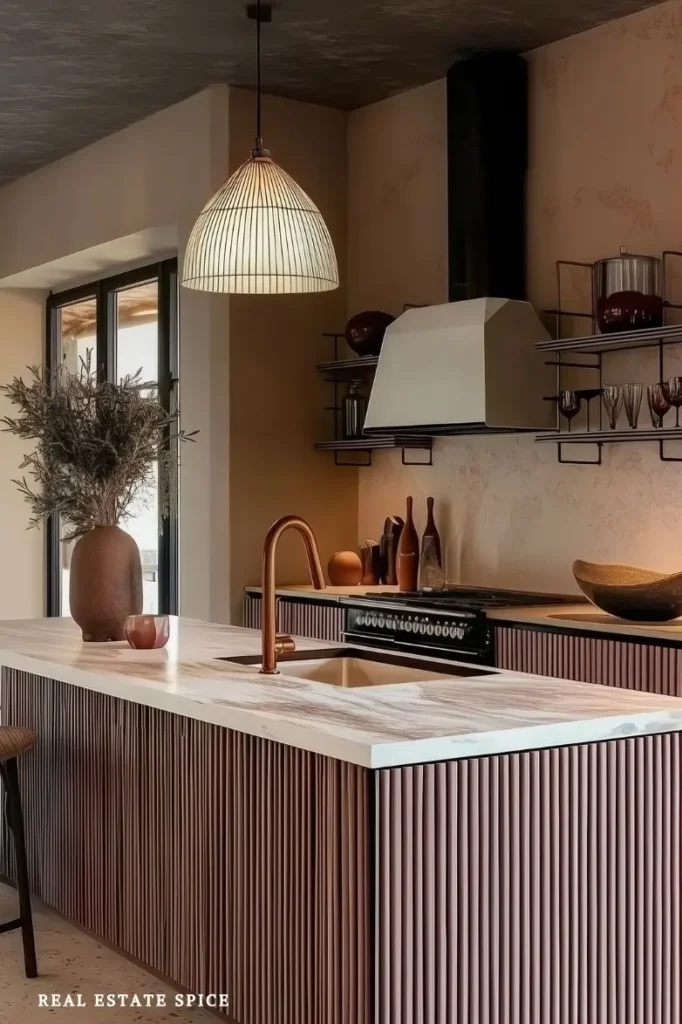
The Countertop Styling Secret Nobody Says Out Loud

Ready for a slightly weird (but wildly helpful) one?
The most expensive-looking countertops usually have fewer tiny things and a little more visual weight.
Not actual weight—don’t go dragging your stand mixer out just to prove a point.
I mean the counter looks more polished when it has one grounded moment instead of a bunch of small items sprinkled everywhere.
Because here’s what happens: a tiny candle next to a tiny spoon rest next to a tiny sign that says “Eat” turns into a whole lot of tiny.
Even when it’s clean, your eye reads it as clutter.
Instead, go for one bigger, intentional anchor—like a substantial cutting board leaned against the backsplash, a small lamp, a single bowl of fruit, one or two lanterns or candles, or a tray with two or three cohesive pieces.

Then let the rest of the counter breathe.
You’re not decorating every inch… you’re creating one calm, chosen moment that makes the whole kitchen feel more expensive.
What If You Hate Your Countertops?

Oh friend, welcome to the club of many.
This is so common—and it’s also not a crisis. (Annoying? Yes. The end of the world? No.)
If you don’t love your countertops, the goal isn’t to stare at them daily like they personally betrayed you.
Your goal is to make them a supporting character instead of the star of the show.
Calm the visual clutter, choose accessories that coordinate, and upgrade your lighting so the counters look better and give it that, ohhhhh yesss… now this is, I don’t want to leave.
This is my space.
Because a lot of the “designer-expensive” look isn’t the countertop material—it’s the whole scene.
Think of it like an outfit.
The basic top can look amazing when the rest of the look is working together.
Your counters are the basic top.
We’re styling the rest.
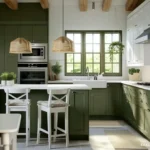
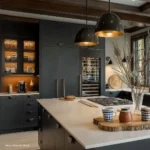
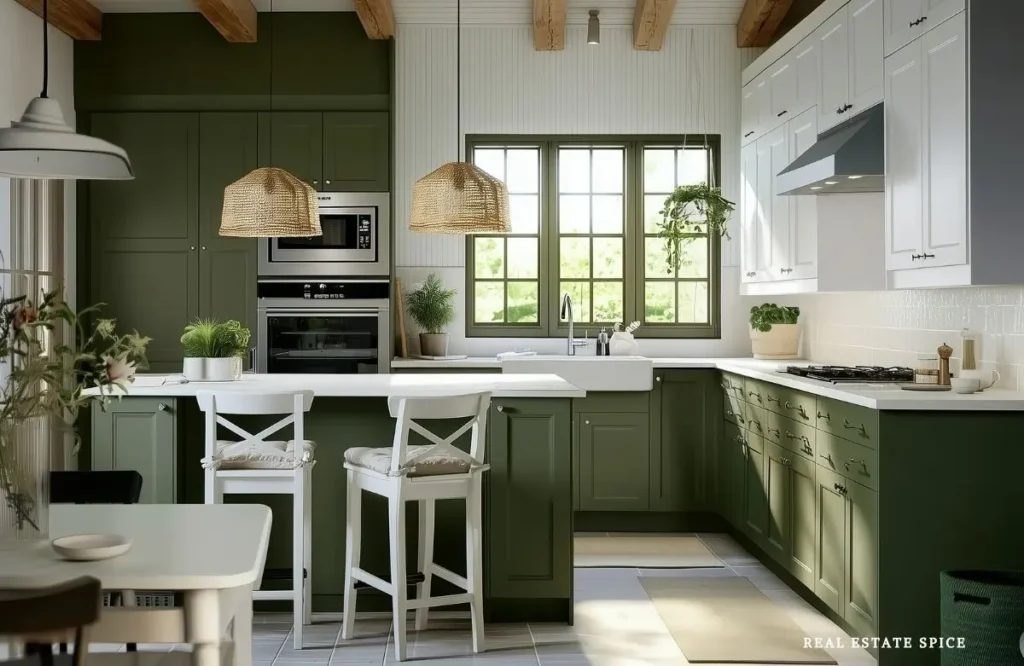
Area 3: Kitchen Lighting (The Upgrade That Makes Everything Look Better)

Lighting is the most underrated “expensive kitchen” lever.
It changes how your counters look, how your cabinets look, and how you feel while you’re cooking pasta for the third time this week like it’s your signature dish.
Also?
Lighting is basically the makeup for your kitchen.
It’s the same kitchen, with different lighting and a whole new personality.
The Lighting Rule of 3 Inside the Kitchen Rule of 3
Yes, we’re doing a Rule of 3 inside a Rule of 3.
It’s very on-brand, and I have zero regrets.
A kitchen that looks designer-expensive usually has three layers of light: general light so the room feels bright, task light so you can actually see what you’re doing, and accent light so the kitchen feels warm and intentional instead of “welcome to the lab.”
And even if you can’t rewire anything, you can still create these layers with bulbs, plug-ins, and a little strategy.
We’re going for the effect, not the construction permit.
The Cheapest Upgrade With the Biggest Payoff: The Right Bulbs

If your kitchen looks flat, harsh, or weirdly blue, check the bulbs first.
This is usually the sneaky culprit.
Some bulbs are too cool and make your kitchen feel sterile.
Some are too dim and make it feel like your kitchen is going through a moody phase.
And some flicker in a way that makes you look like you haven’t slept since 2017, which is honestly unnecessary.
When your bulbs are the right warmth, everything instantly looks richer—cabinets, counters, backsplash, all of it.
You’ll be standing there like, “Wait… was it really just the bulbs?” Yes. Yes it was.
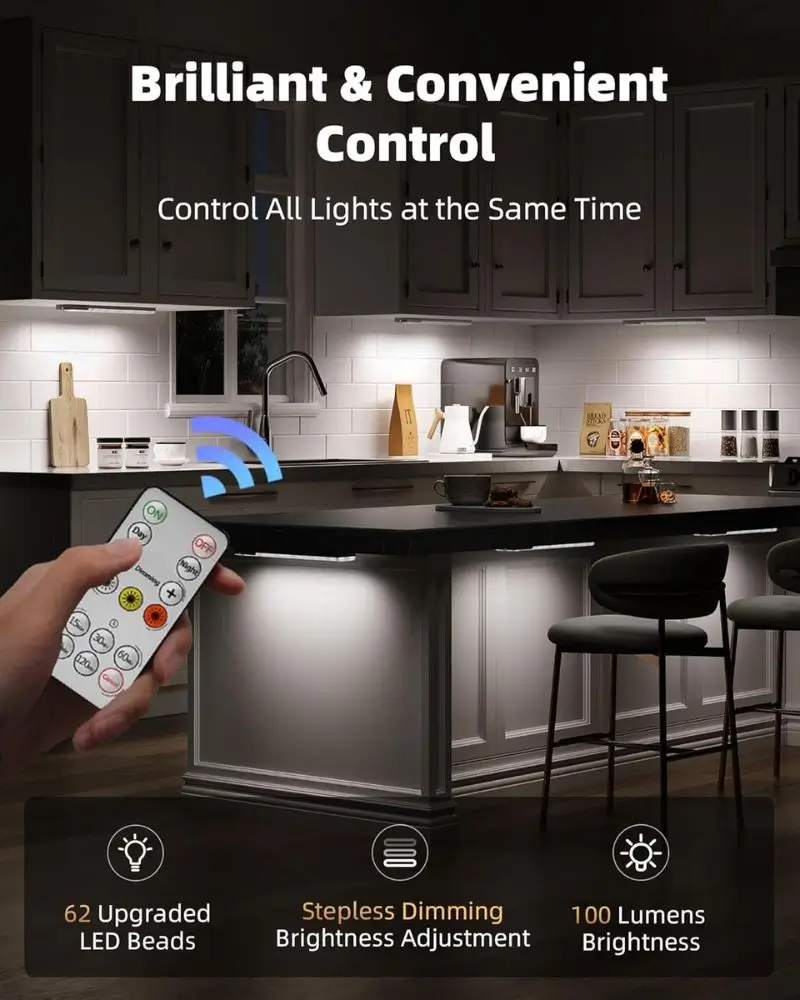
Under-Cabinet Lighting: Instant High-End, Even in a Basic Kitchen
If I had to pick one lighting upgrade that makes a kitchen look expensive fast, under-cabinet lighting wins.
It adds that soft, high-end layer across the counters, makes the backsplash look more elevated, and gives the kitchen that “someone planned this” feeling.
And it’s practical—you can see what you’re chopping, which is a solid perk if you enjoy keeping your fingertips.
Renting or avoiding a big project?
There are plug-in and stick-on options that do the job beautifully.
The goal is the look and the feel—not turning your week into an electrical adventure.
Dimmers: The “Fancy House” Feeling Without Doing Anything Fancy
Dimmers are one of those upgrades that immediately feels like “ohhh, we live somewhere nice now.”
Bright light is great when you’re cooking and cleaning.
Softer light is great when you’re hanging out, unloading the dishwasher, or doing the late-night “just one more snack” situation like a tiny kitchen raccoon.
If you can’t install dimmers, you can still fake the vibe by layering light sources—under-cabinet lights, a plug-in accent light, or a small lamp tucked into a corner.
The point is giving your kitchen a softer look, because an expensive kitchen doesn’t only look good at noon.
It looks good at night, too.
Low Ceilings or Small Kitchens: You’re Not Stuck

If your kitchen has low ceilings, awkward overhead lighting, or a layout that makes you feel like you’re cooking inside a shoebox, lighting matters even more.
In a small kitchen, the goal is to spread light evenly and avoid fixtures that visually overwhelm the space.
In low-ceiling kitchens, it’s choosing lighting that sits closer to the ceiling and keeps the room feeling open—while still being flattering, not harsh.
The Nighttime Kitchen Light That Makes You Like Your Space More

There’s something quietly luxurious about walking into your kitchen at night and not getting blasted by one aggressive overhead light like you’re entering a big-box store.
This is where layered lighting becomes more than design—it becomes comfort.
It’s the kind of shift that makes you want to tidy up a little faster because the room feels nicer, and you want to keep it that way.
You don’t need anything dramatic.
You just need warm, soft light in the right places so the kitchen feels cared for.
The Rule of 3 Reset: How to Keep These Areas Looking Nice Without Constant Cleaning

The secret to an expensive-looking kitchen isn’t cleaning all day.
It’s a quick reset that brings the room back to calm without turning into a whole production.
When your island has an anchor piece and your counters have one “pretty zone,” your kitchen resets quickly and doesn’t need to be perfect everywhere.
And when your lighting is layered, the whole space looks better even when real life is happening.
Build a tiny rhythm that fits your actual days: a quick sweep of the island, a quick wipe of the sink zone, and a quick light check at night so the kitchen feels warm and settled.
The point isn’t perfection.
The point is getting your kitchen back to “nice” without it becoming a whole event.
The Mistakes That Make These Three Areas Look Cheaper (And the Fix)

When the Island Becomes a Storage Unit With Feelings
If your island is covered in paperwork, random bags, and the emotional weight of your to-do list, it’s going to feel chaotic—no matter how pretty your kitchen is.
Real life happens, so the goal isn’t “never set anything down.”
Give the chaos a contained landing spot (tray, bowl, bin—anything with boundaries) and you’ll be shocked how quickly the island snaps back to looking pulled together.
When the Counters Become a Visual Argument

Too many items scattered across the counter makes the kitchen feel busy and smaller, even if everything is technically “useful.”
Instead of decorating every inch, pick one pretty zone and let the rest breathe.
You want curated areas, not twenty tiny distractions trying to audition for attention.
When the Lighting Is Doing You Dirty
Cool bulbs, harsh overhead glare, and uneven lighting can make a kitchen feel cheaper even when everything else is nice.
Think warmer, softer, and layered—so the room has a bright “work mode” and a calmer “life mode.”
Add a little light where it counts (counters and sink), and suddenly your whole kitchen looks more polished… and a lot more flattering.
Remember, Let the 3 Kitchen Areas Do The Heavy Lifting
Here’s the good news: you don’t need a remodel to make your kitchen feel designer—you just need a plan for the three areas that do the heavy lifting: the island, the countertops, and the lighting.
Give the island a contained landing spot, keep the counters edited with one pretty zone, and switch to warmer, layered light that flatters everything.
Pick one small upgrade in each area, and you’ll be amazed at how fast the whole kitchen starts looking pulled together—without turning your week into a “why did I start this?” situation.
And even when real life is happening, your kitchen can still look like it got dressed on purpose.
Get My Free eBook
“100 Easy Ways To Refresh Any Room All Year Round”
Kitchen Areas Rule of 3 FAQ
What if I can only focus on one area right now?
Start with lighting if your kitchen feels dark or harsh. Start with countertops if your kitchen feels cluttered. Start with the island if your kitchen feels chaotic the moment you walk in. Any one of these will make a noticeable difference, and you can build from there.
How do I make this work in a rental?
Rentals shine with the island anchor trick, a cohesive sink zone, and layered lighting that doesn’t require hardwiring. You’re creating the expensive look through calm and cohesion, not permanent construction.
Do I need matching everything to look expensive?
No. You need repetition and intention.
When finishes repeat and areas feel purposeful, your kitchen looks designed. When everything is random, it looks accidental. You can mix styles, you just can’t mix them like they’ve never met each other.
What’s the fastest “I did something” win?
The sink zone. If you want a quick win that changes how the whole kitchen feels, make the sink area look cohesive and tidy. It’s small, but it’s powerful.